Manage engine profiles
Administrators manage engine profiles in the H2O AI Cloud web interface through the Admin > AI Engines section. This page provides step-by-step instructions for creating, viewing, editing, and deleting profiles for H2O Driverless AI, H2O-3, and Notebook engines.
For an overview of what profiles are and how they relate to engines, see Engine profiles. For security-relevant settings and hardening recommendations, see Engine profile security configuration. For Python client examples, see the engine-specific profile pages listed in Profile types.
Prerequisites
- You need an engine admin role for the engine type you want to manage:
- Driverless AI:
enginemanager-dai-engine-admin - H2O-3:
enginemanager-h2o-engine-admin - Notebook:
enginemanager-notebook-engine-admin
- Driverless AI:
- Profiles are managed in the
workspaces/globalworkspace, so your admin role must be assigned in the global workspace. - You need access to the H2O AI Cloud web interface.
See RBAC roles and permissions for the full permission breakdown.
Access engine profiles
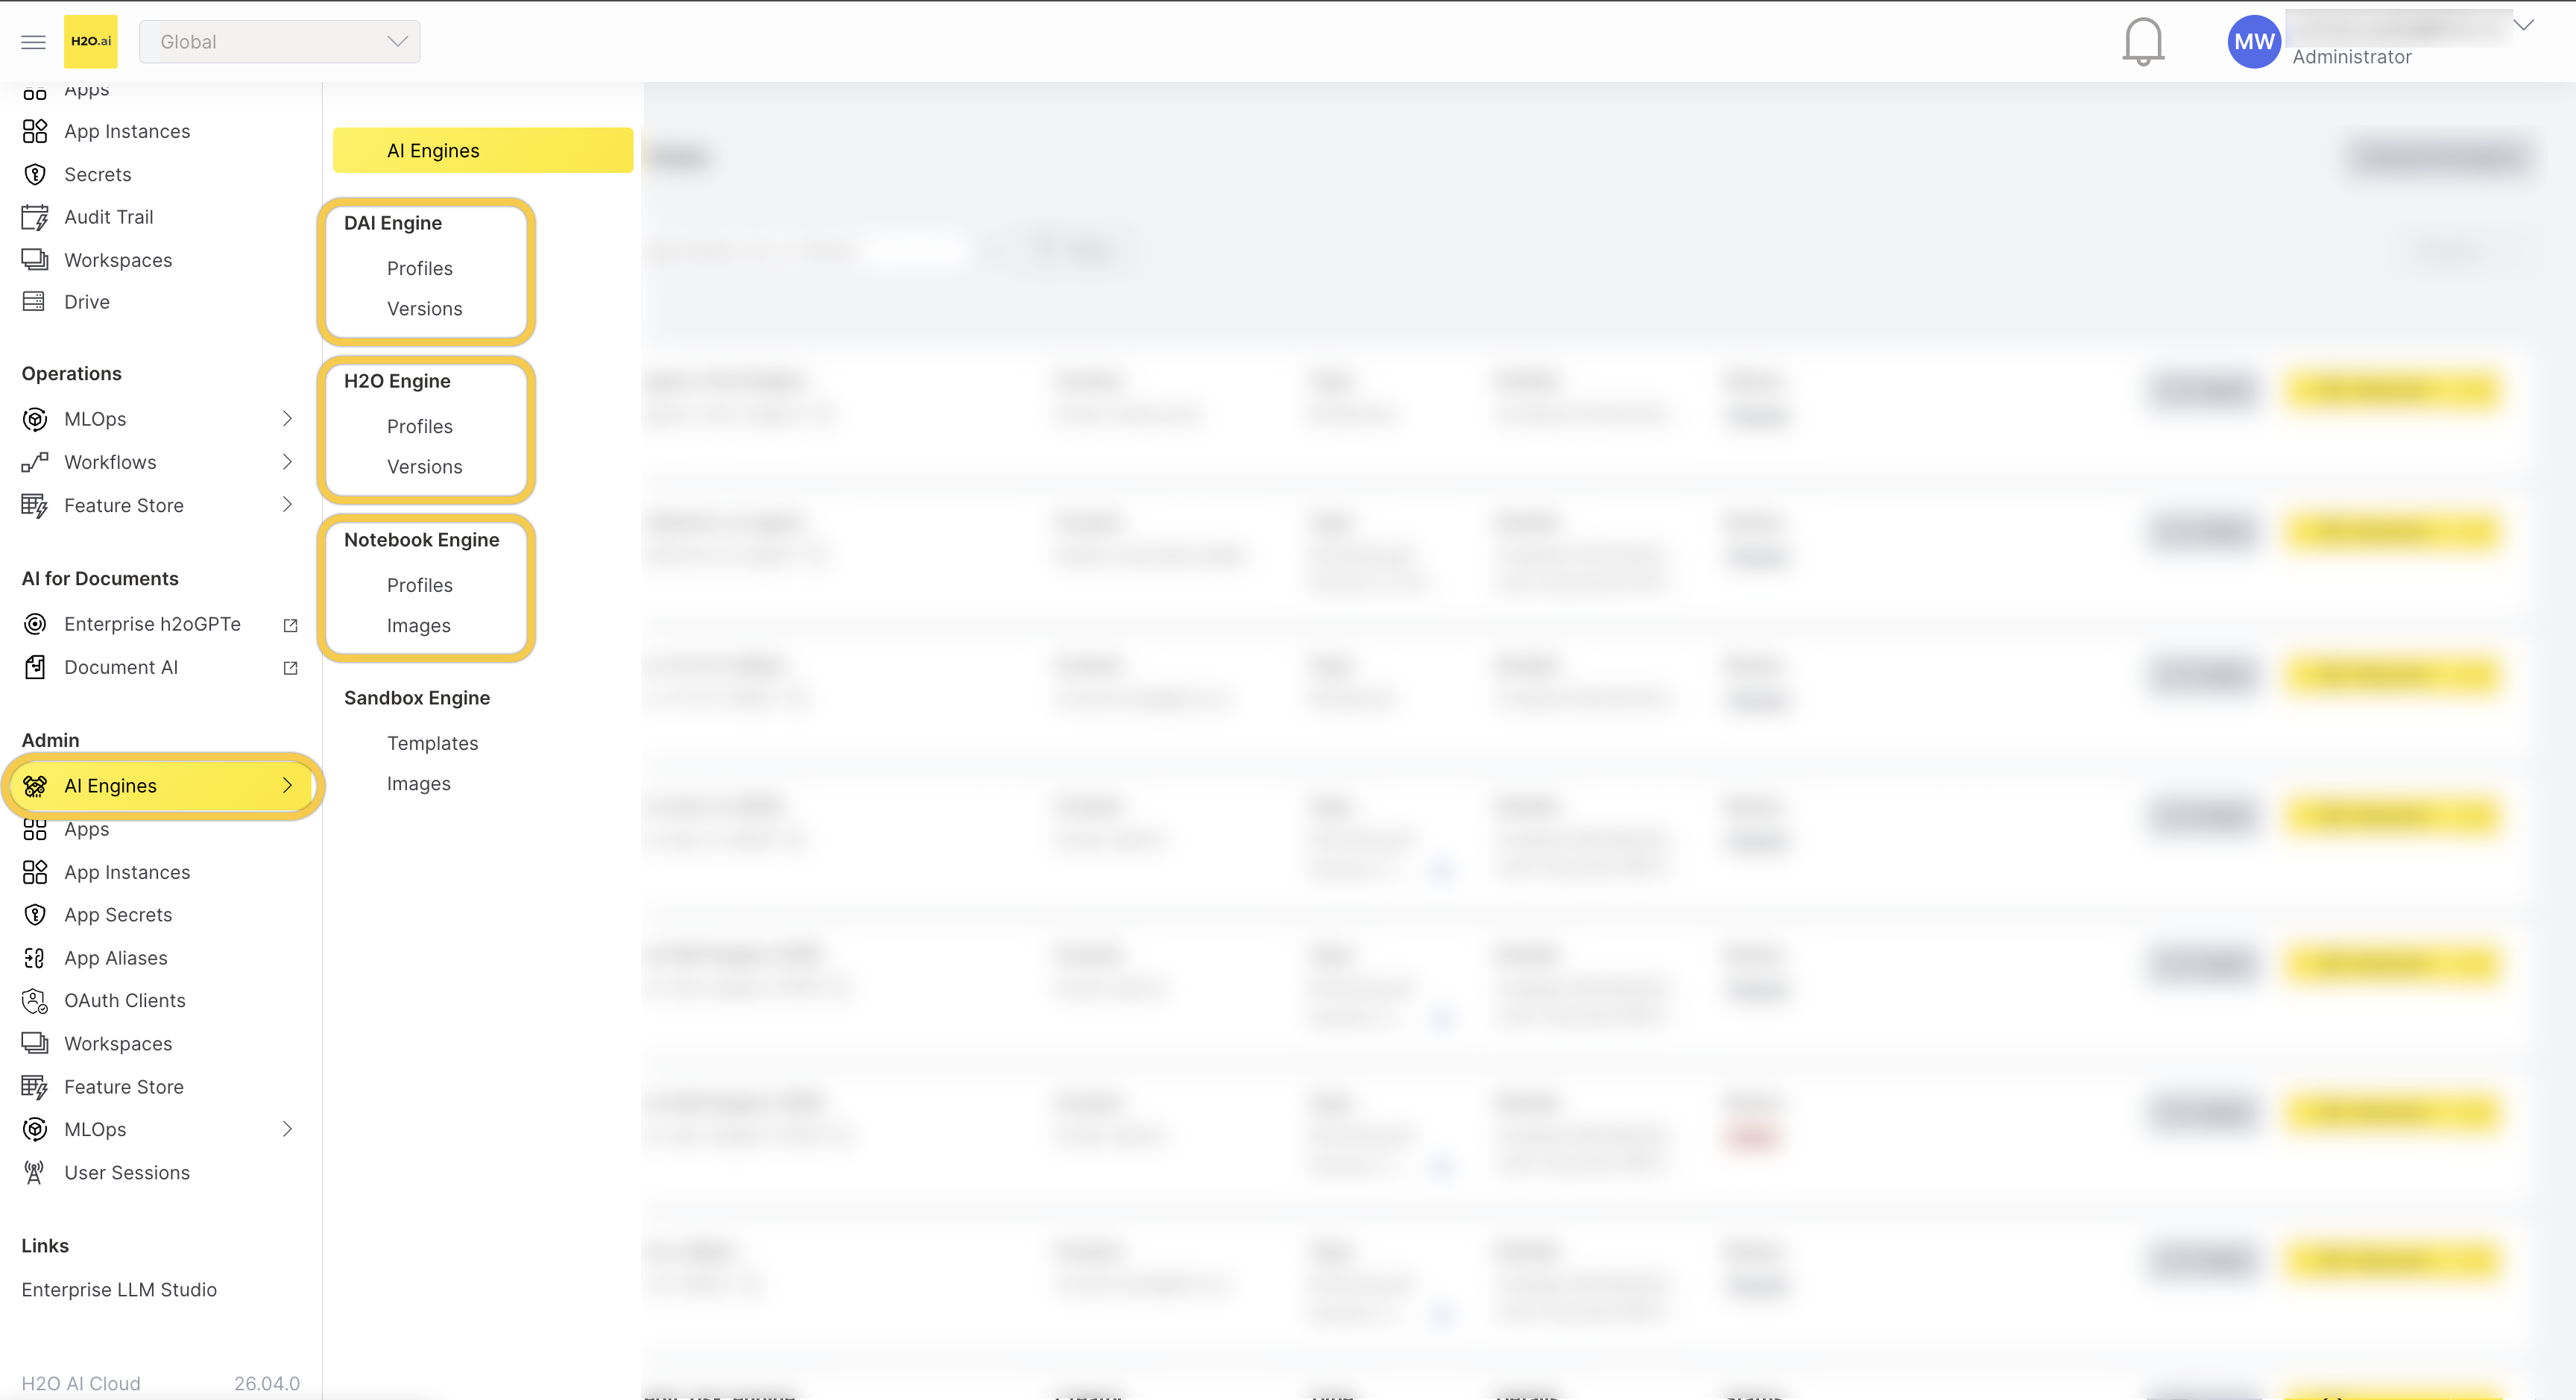
- In the H2O AI Cloud left navigation, go to Admin > AI Engines.
- In the AI Engines secondary sidebar, locate the engine type you want to manage (DAI Engine, H2O Engine, or Notebook Engine).
- Under the engine type, click Profiles.
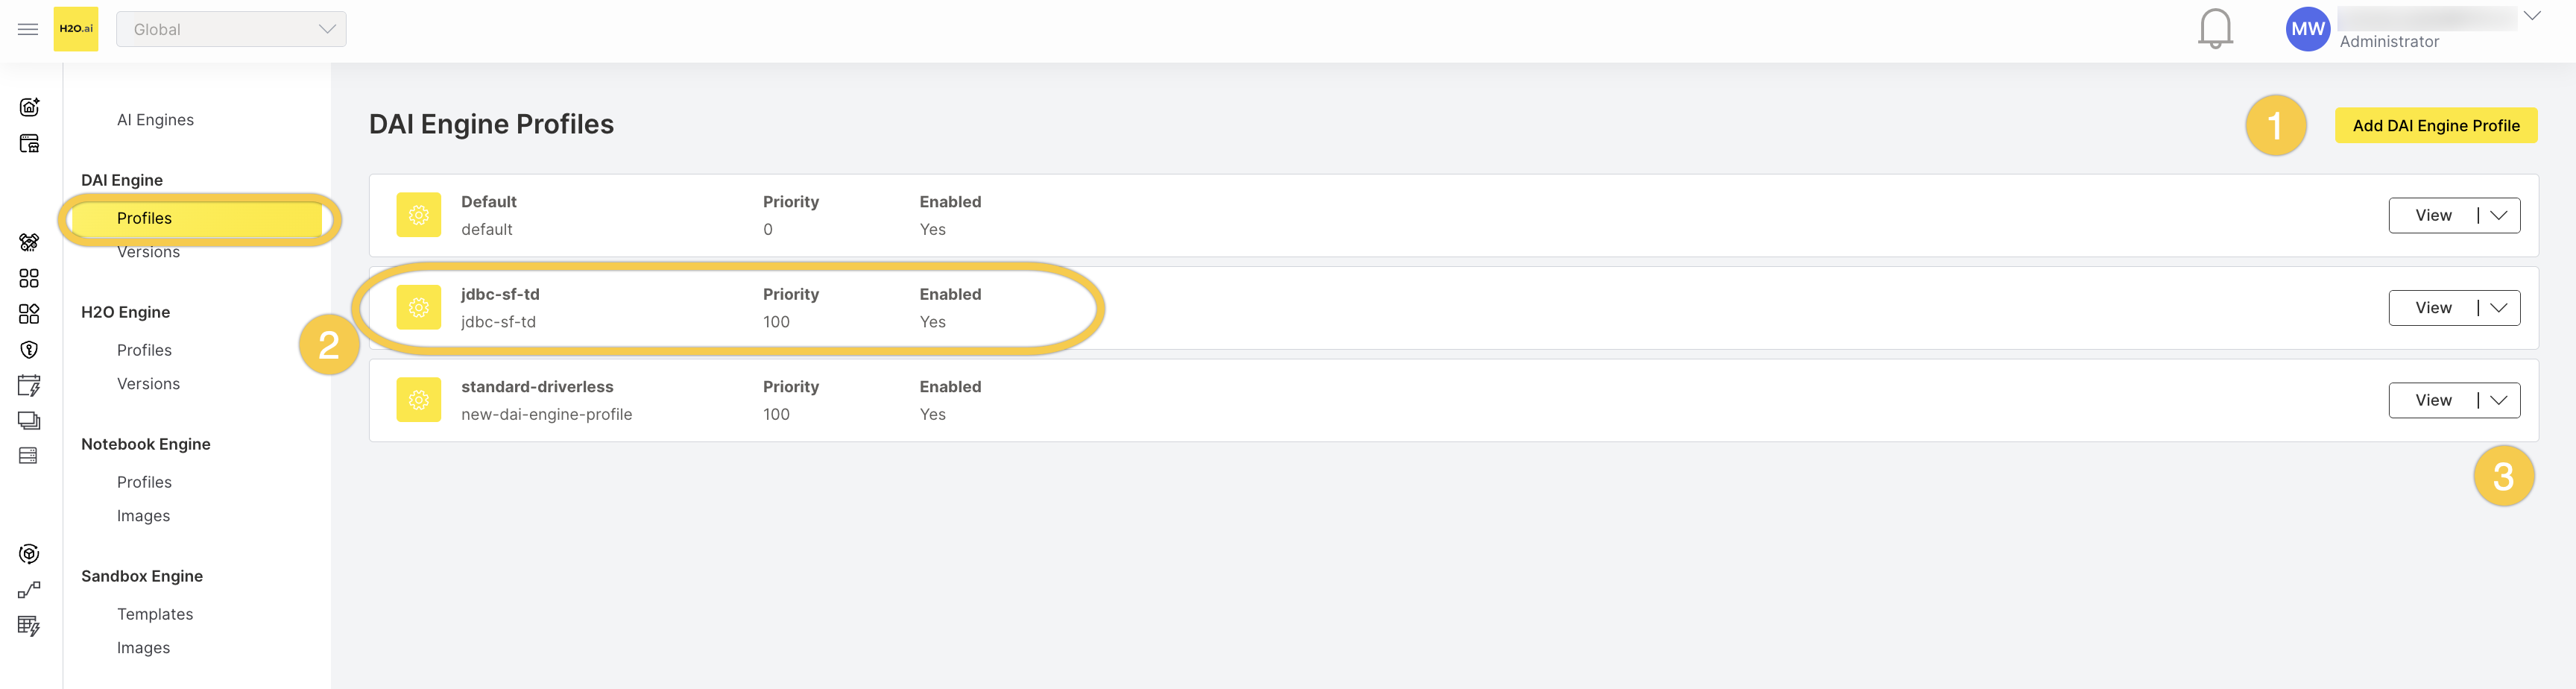
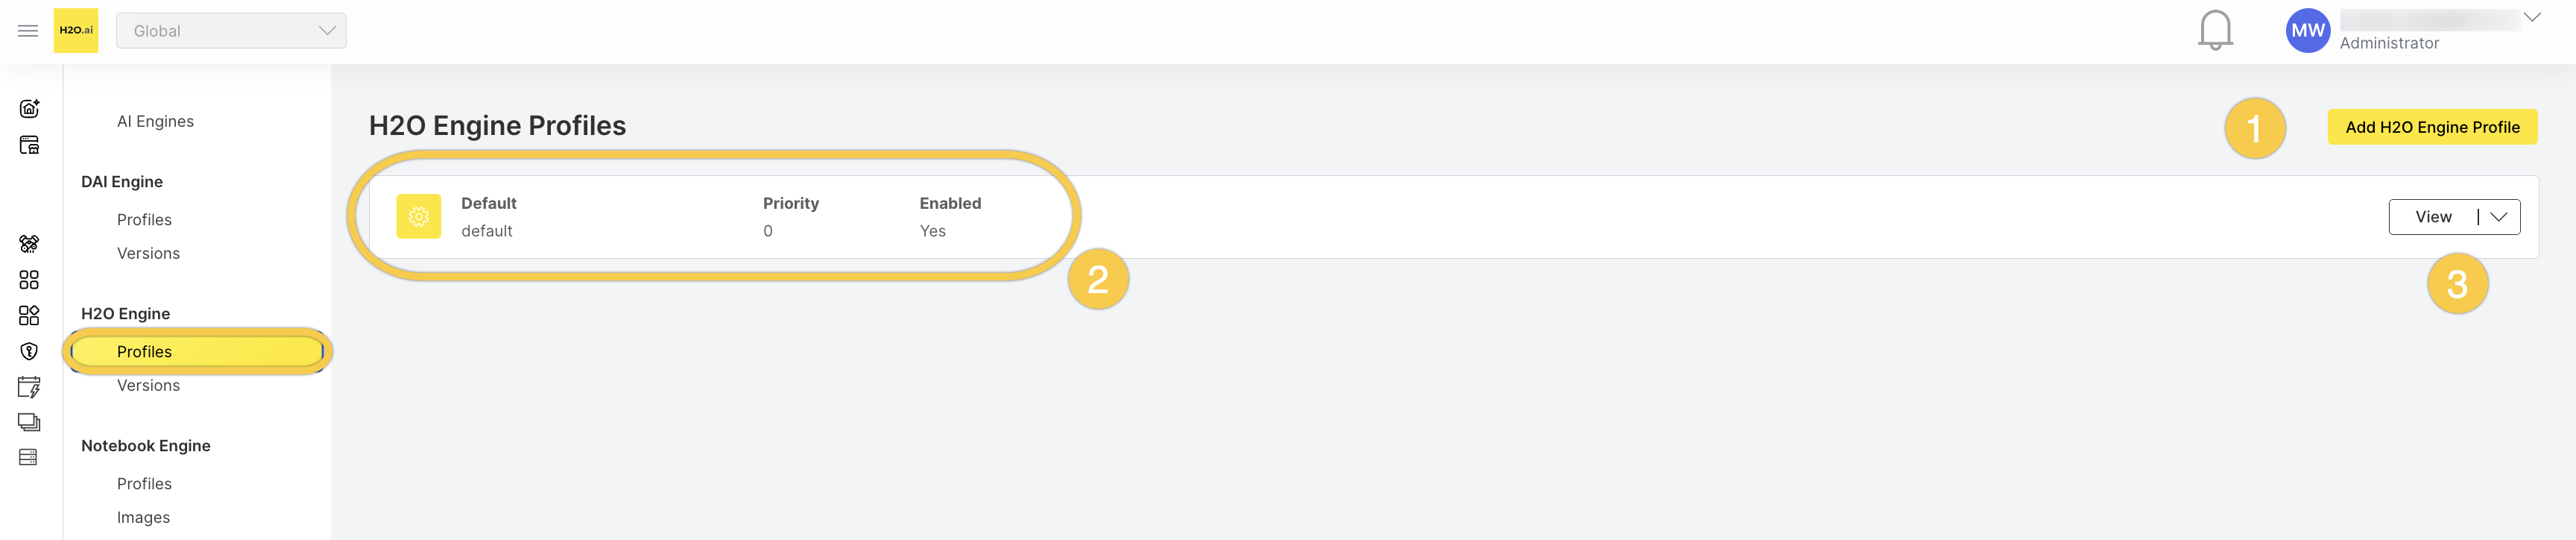
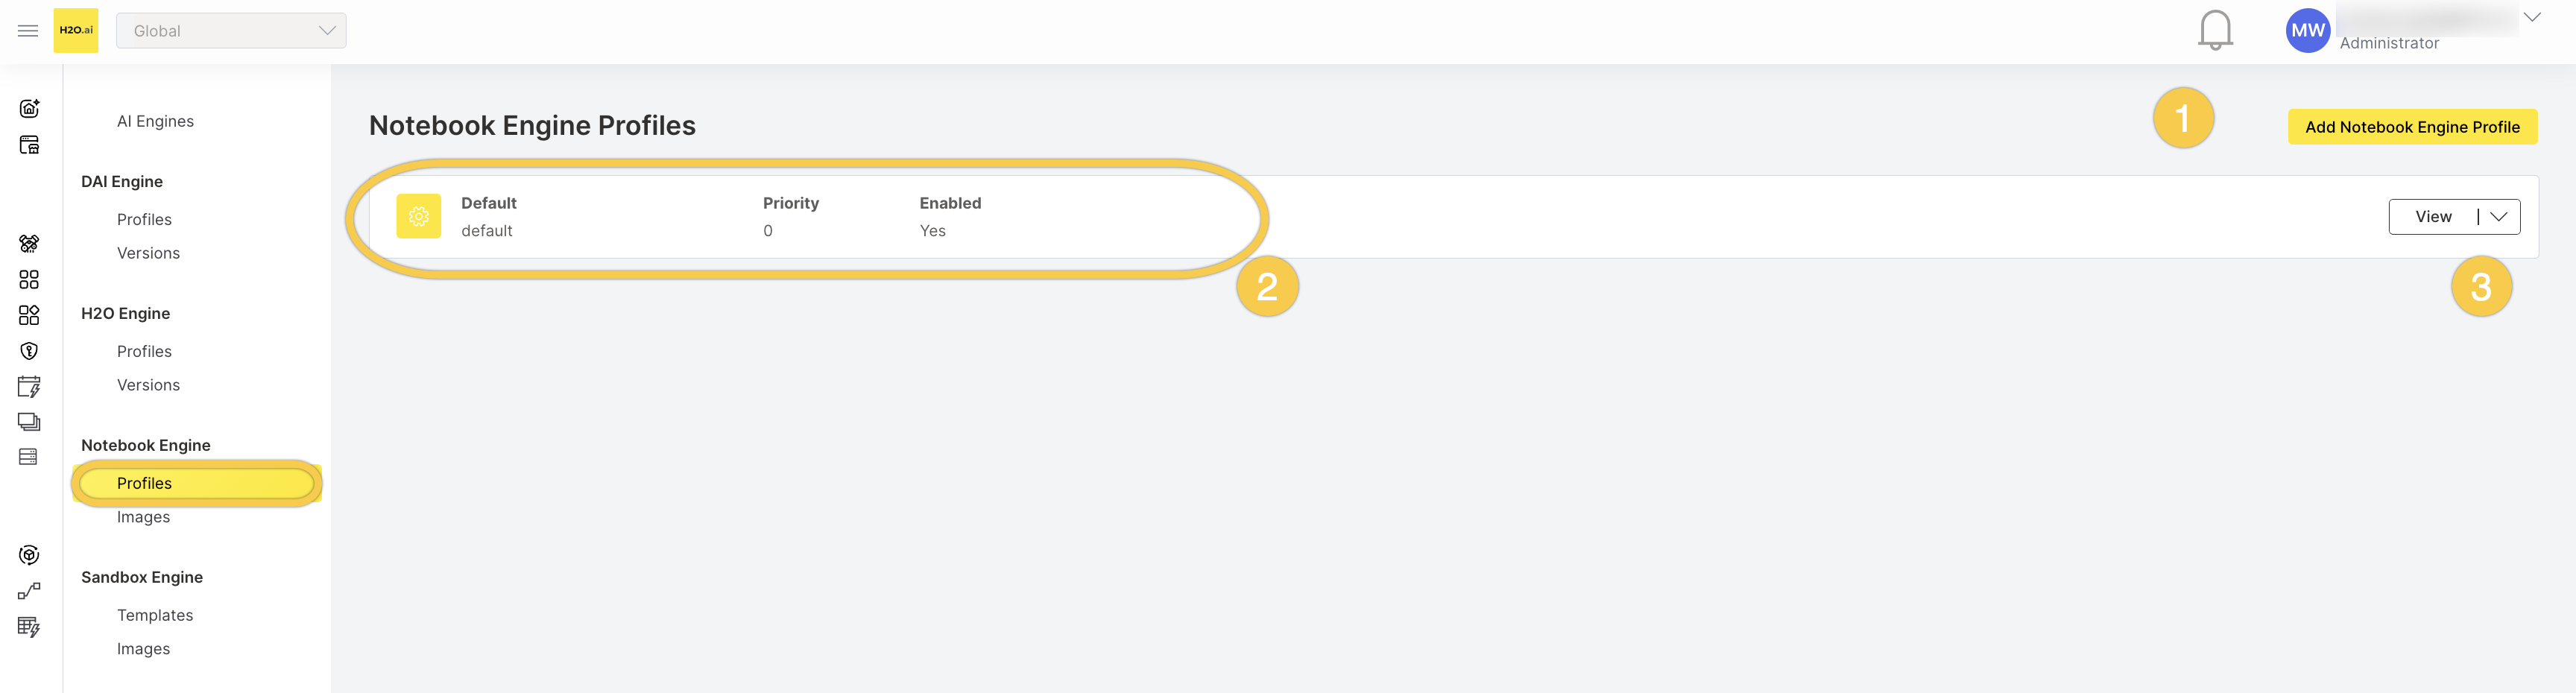
The profile list displays all profiles for the selected engine type. Each profile row (2) shows the profile's display name, profile ID, priority, and enabled status (shown as Yes or No in the Enabled column).
From the profile list, you can:
- Click Add [Engine Type] Engine Profile (1) to create a new profile.
- Click View (3) to view a profile's details.
- Click the dropdown menu next to View (3) to edit or delete a profile.
Create a profile
- Navigate to the profile list for the engine type you want to configure (see Access engine profiles).
- Click Add [Engine Type] Engine Profile (for example, Add DAI Engine Profile).
- Configure the profile settings described in the following sections.
- Enable the profile to make it available to users, or leave it disabled and enable it later.
- Click Save to create the profile.
H2O AI Engine Manager creates no profiles by default. Until an administrator creates at least one profile and one engine version or notebook image per engine type, users cannot create engines of that type. See Engine versions and images.
To create a profile based on an existing one, use the REST API — each profile type has a :copy operation that copies an existing profile to a new profile ID in workspaces/global. See the REST API reference.
General settings
Configure the following general settings:
| Field | Required | Description |
|---|---|---|
| Profile ID | Yes | A unique identifier that becomes part of the profile's resource name (for example, ds-team-gpu). Must be 1-63 characters, contain only lowercase letters, digits, and hyphens, start with a letter, and end with a letter or digit. Cannot be changed after creation. |
| Display Name | No | A human-readable name for the profile. This name appears in the Profile dropdown when users create an engine. |
| Priority | No | An integer that controls display order. Lower values appear first in the profile list and in the Profile dropdown. |
| Enabled | No | Whether the profile is active and available to users. Disabled by default. |
Access control and concurrency settings
Configure the following access control and concurrency settings:
| Field | Required | Description |
|---|---|---|
| Assigned OIDC Roles Enabled | No | When turned on, only users with at least one matching OpenID Connect (OIDC) role can see and use the profile. |
| Assigned OIDC Roles | No | The OIDC roles that grant access to this profile. Set this when Assigned OIDC Roles Enabled is turned on. |
| Max Running Engines | No | Maximum number of engines of this type a single user can run simultaneously. This count includes all of that user's active engines in the workspace regardless of which profile they use (see Resource constraints for what counts as active). When unset, there is no limit. |
If you turn on Assigned OIDC Roles Enabled but leave Assigned OIDC Roles empty, no user can see or use the profile. Always assign at least one role when turning on role-based access.
Resource constraints
Each resource constraint defines the allowed range for a resource using four subfields:
| Subfield | Description |
|---|---|
| Minimum | The lowest value a user can set. |
| Maximum | The highest value a user can set. When unset, there is no upper limit. |
| Default | The value used when the user does not specify one. |
| Cumulative Maximum | The maximum total across all of a user's engines of this type in the workspace, regardless of which profile they use. When unset, there is no cumulative limit. Not available for duration constraints. |
For CPU, GPU, memory, and node count, only active engines count toward the cumulative total. An engine is active in every state except paused, failed, or terminated, so transitional states such as starting, pausing, and deleting still count. For storage, all engines count regardless of state, because storage remains allocated throughout the engine lifecycle until the engine is deleted.
When you save a profile, the values in each constraint are validated: Default must be between Minimum and Maximum, Maximum must be greater than or equal to Minimum, and Cumulative Maximum must be greater than or equal to Maximum. Minimum and Default must be at least 1 for every numeric constraint except GPU, which can be 0.
Configure the following resource constraints:
| Constraint | Required | Applies to | Description |
|---|---|---|---|
| CPU | Yes | All | Allowed CPU unit range. |
| GPU | Yes | All | Allowed GPU unit range. |
| Memory | Yes | All | Allowed memory range (GiB). |
| Storage | Yes | Driverless AI, Notebook | Allowed persistent storage range (GiB). |
| Node Count | Yes | H2O-3 only | Allowed number of distributed H2O-3 nodes. See H2O Engine settings. |
One CPU unit corresponds to one Kubernetes CPU. GPU units are whole units of the GPU resource configured for the profile (nvidia.com/gpu unless the profile sets a different GPU resource name). For H2O-3 engines, resource constraints apply per node (see H2O Engine settings), and the Cumulative Maximum caps the sum of the per-node values, not the total consumption (per-node value multiplied by node count).
Always set an explicit Maximum for each resource constraint. Leaving it unset means unlimited, which can lead to resource exhaustion.
Duration constraints
Configure the following duration constraints:
| Constraint | Required | Description |
|---|---|---|
| Max Idle Duration | Yes | Allowed range for the maximum time an engine can remain idle before it is auto-paused (Driverless AI, Notebook) or terminated (H2O-3). |
| Max Running Duration | Yes | Allowed range for the maximum time an engine can run before it is auto-paused (Driverless AI, Notebook) or terminated (H2O-3). |
Duration constraints support Minimum, Maximum, and Default subfields only. They do not have a cumulative maximum.
How idle time is measured depends on the engine type: a Driverless AI engine is idle when it has no running or scheduled tasks, a Notebook engine is idle when its Jupyter server has no running kernels, and an H2O-3 engine is idle when the cluster reports no activity. For Notebook engines, the platform applies the idle timeout in two stages: first it shuts down idle kernels; then it shuts down the server after all kernels have stopped. As a result, an idle Notebook engine can take up to twice the configured Max Idle Duration to pause.
When an H2O-3 engine reaches its maximum idle or running duration, it is terminated, not paused — H2O-3 has no pause capability, and any data held in the cluster's memory is lost. The maximum running duration is based on elapsed time and applies even while a job is in progress.
Driverless AI Engine settings
Driverless AI Engine profiles include the following additional settings. For a full description of each field, see Driverless AI Engine profiles.
| Field | Required | Description |
|---|---|---|
| Config Editability | Yes | Controls whether users can modify Driverless AI configuration parameters. Select one of the following three options. |
| Base Configuration | No | Default Driverless AI configuration that users can override when Config Editability allows it. Enter as key-value pairs. |
| Configuration Override | No | Configuration values that always override user settings. Users cannot change these values. Enter as key-value pairs. |
| Triton Enabled | No | Turns on the built-in NVIDIA Triton Inference Server (for low-latency model scoring) in engines created with this profile. |
| Max Unused Duration | No | Auto-deletes a Driverless AI engine that stays in a paused or failed state for this duration. |
| Max Non-Interaction Duration | No | When set, the engine is auto-paused only if it is idle and has had no system interaction for this duration. |
Config Editability accepts one of three values:
- Disabled (
CONFIG_EDITABILITY_DISABLED) — users cannot change any configuration. - Base Config Only (
CONFIG_EDITABILITY_BASE_CONFIG_ONLY) — users can change only the keys listed in Base Configuration. - Full (
CONFIG_EDITABILITY_FULL) — users can set any configuration key, except values enforced by Configuration Override or reserved by the platform.
Setting Config Editability to Full lets users override Driverless AI configuration freely. Use Disabled or Base Config Only unless users genuinely need full configuration control. Use Configuration Override to enforce security-relevant values that users must not change.
Set Max Unused Duration to clean up abandoned engines automatically. This prevents paused or failed engines from consuming storage indefinitely.
H2O Engine settings
H2O Engine profiles include the following additional settings. For a full description of each field, see H2O Engine profiles.
| Field | Required | Description |
|---|---|---|
| Node Count | Yes | Allowed range for the number of distributed H2O-3 nodes. CPU, GPU, and memory constraints are per node. The total resources consumed equal the per-node values multiplied by the node count. |
| Java Classpath | No | Extra Java classpath for the H2O-3 process. |
| Java Options | No | Extra command-line options passed to Java. |
| H2O Options | No | Extra command-line options passed to H2O-3. |
Review Java Classpath for untrusted JAR files, Java Options for debug or remote-access flags (such as -agentlib:jdwp), and H2O Options for flags that alter networking or authentication behavior before saving the profile. These values are passed directly to the process in every engine created with this profile.
Set a Cumulative Maximum on the Node Count constraint to cap the total number of H2O-3 nodes a single user can run across all their engines. A profile that allows 10 nodes per engine with no cumulative limit can consume many nodes' worth of resources.
Notebook Engine settings
Notebook Engine profiles include the following additional settings. For a full description of each field, see Notebook Engine profiles.
| Field | Required | Description |
|---|---|---|
| Sync Git Repository Enabled | No | Turns on automatic Git repository sync when a Notebook engine is created with this profile. |
| Git Repository | No | The Git repository URL to clone into each notebook. Required when Sync Git Repository Enabled is turned on. The repository must be accessible from the Kubernetes cluster. |
| Git Ref | No | The Git revision (branch, tag, or commit hash) to check out. Defaults to HEAD. |
| Git Directory Name | No | The directory name in the user's home folder for the synced repository. Defaults to Example. |
Sync only trusted repositories. The synced content runs inside every notebook environment created with this profile. Pin Git Ref to a specific tag or commit hash rather than relying on HEAD.
Advanced Kubernetes settings
Profiles also include advanced Kubernetes settings — a custom pod template spec, GPU tolerations, the GPU resource name, and (for Driverless AI and Notebook profiles) a storage class. For descriptions of these fields and their security implications, see Pod-level controls.
The custom pod template spec is merged into the engine pod using strategic merge patch and can override security-critical pod settings, including the security context, volume mounts, and container definitions. Review any custom pod template spec carefully before saving.
View a profile
- Navigate to the profile list for the engine type (see Access engine profiles).
- Find the profile you want to inspect.
- Click View.
The profile detail view displays all configured fields: resource constraints (minimum, maximum, default, and cumulative maximum values), duration limits, access controls, and engine-specific settings.
Edit a profile
- Navigate to the profile list for the engine type (see Access engine profiles).
- Find the profile you want to modify.
- Click the dropdown menu next to View.
- Select Edit.
- Update the fields you want to change. See Create a profile for field descriptions.
- Click Save to apply your changes.
Changes to a profile do not affect engines that are currently running, because engines capture a snapshot of the profile's settings at startup. Paused engines pick up the updated profile settings on their next resume, and the platform revalidates each engine against the updated profile at that point. A paused engine cannot resume if:
- Its CPU, GPU, memory, or duration values no longer fit the updated profile's constraints.
- Its configuration is no longer allowed by the profile's Config Editability and Configuration Override settings (Driverless AI engines only).
- Its profile is no longer accessible to the user resuming it, because you turned on Assigned OIDC Roles Enabled or narrowed the Assigned OIDC Roles list.
- The profile is disabled (the Enabled setting is off).
Storage values are exempt from revalidation because storage cannot be changed after engine creation. A user with engine update permission in the engine's workspace can update the engine's values to fit the new constraints or reassign the engine to a different enabled profile, and then resume it.
H2O-3 engines are terminated (not paused) when they reach their duration limit and cannot be paused or resumed. The paused-engine caveats in this section apply only to Driverless AI and Notebook engines.
Delete a profile
- Navigate to the profile list for the engine type (see Access engine profiles).
- Find the profile you want to remove.
- Click the dropdown menu next to View.
- Select Delete.
- Confirm the deletion when prompted.
Deleting a profile is permanent and cannot be undone. Running engines retain their configuration snapshot and are not affected. However, a paused engine that references the deleted profile cannot resume until a user with engine update permission reassigns it to another enabled profile that they can access. If the engine's current values do not fit the new profile's constraints, the user must also update those values before the engine can resume. Users cannot create new engines with a deleted profile.
Related topics
- Engine profiles — overview of engine profiles and how they relate to engines.
- Engine profile security configuration — security reference for all profile, version, and image settings.
- RBAC roles and permissions — roles required for profile management.
- Driverless AI Engine profiles — Driverless AI-specific fields and Python client examples.
- H2O Engine profiles — H2O-specific fields and Python client examples.
- Notebook Engine profiles — Notebook-specific fields and Python client examples.
- Submit and view feedback for this page
- Send feedback about AI Engine Manager to cloud-feedback@h2o.ai