Manage a Notebook Engine
This guide covers all aspects of managing your Notebook Engine in the H2O AI Cloud web interface.
Overview
Once you've created a Notebook Engine, you can perform various management operations:
- Access the Engine: Open and use your notebook environment
- Control Engine State: Pause, resume, and manage engine lifecycle
- View Configuration: Access detailed engine specifications and settings
- Edit Configuration: Modify engine settings when paused
- Manage Resources: Resize engine configurations as needed
- Clean Up: Delete engines when no longer needed
Access Your Notebook Engine
Step 1: Navigate to AI Engines
- From the H2O AI Cloud dashboard, click AI Engines in the left navigation.
- Locate your Notebook Engine in the engines list.
Step 2: Open the Engine
Click Visit to open the Notebook Engine interface.
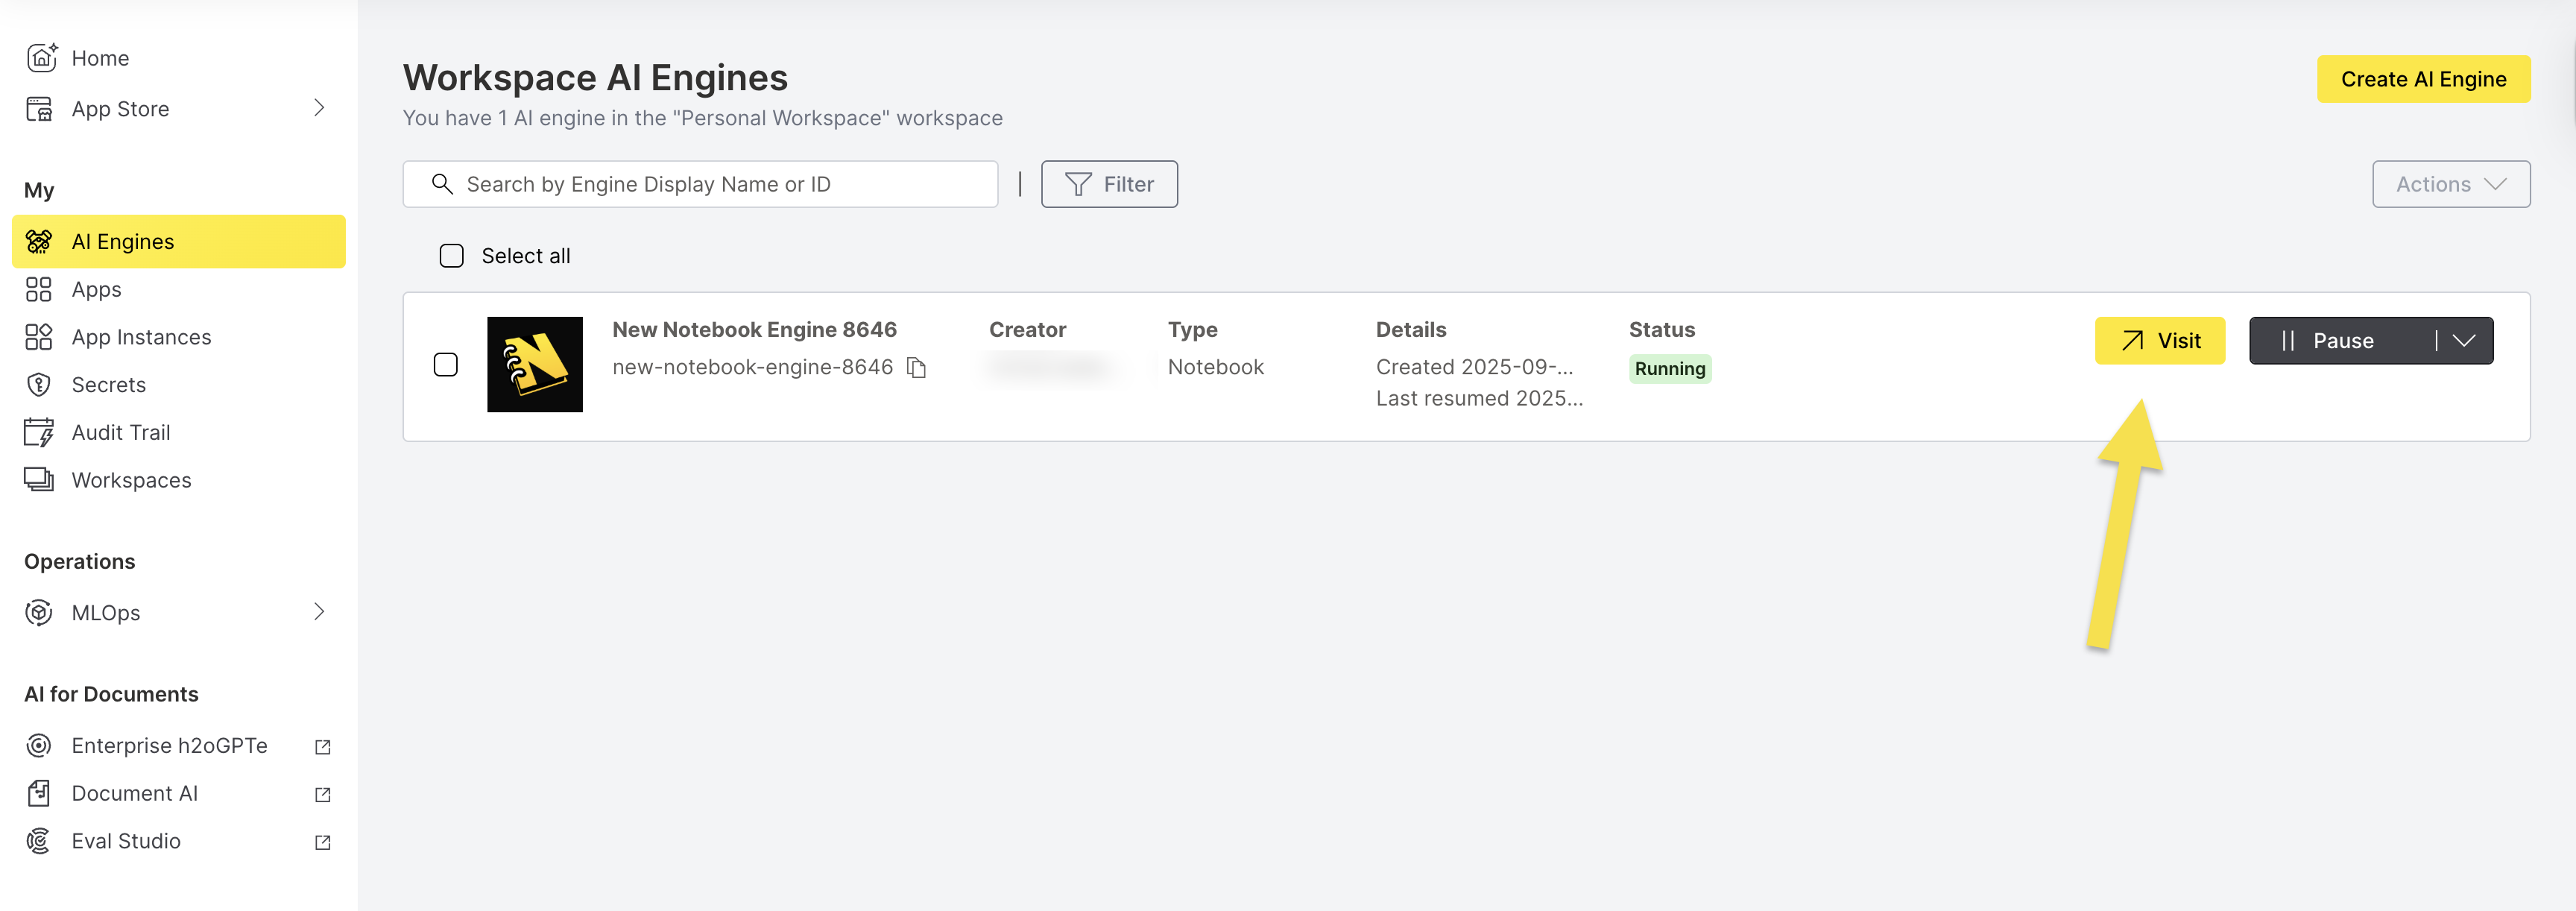
This opens the notebook authoring application (JupyterLab) in a new web browser window where you can:
- Create and edit interactive notebooks
- Execute code in multiple programming languages
- Visualize data and create interactive plots
- Collaborate with team members on data science projects
- Integrate with H2O machine learning frameworks
- Access pre-installed data science libraries and tools
- Save and load notebooks in H2O Drive
- Get help writing and running code from the Enterprise h2oGPTe assistant
The H2O Drive integration and the Enterprise h2oGPTe assistant depend on the image your engine runs, and neither is available on a shared engine. For the full requirements, see H2O Drive integration prerequisites and Enterprise h2oGPTe assistant prerequisites.
Control Engine State
Pause a Notebook Engine
Pausing a notebook engine temporarily stops all operations and helps optimize costs when the engine is not actively being used.
Step 1: Initiate Pause
- From the AI Engines list, locate your running Notebook Engine.
- Click Pause to initiate the pause operation.
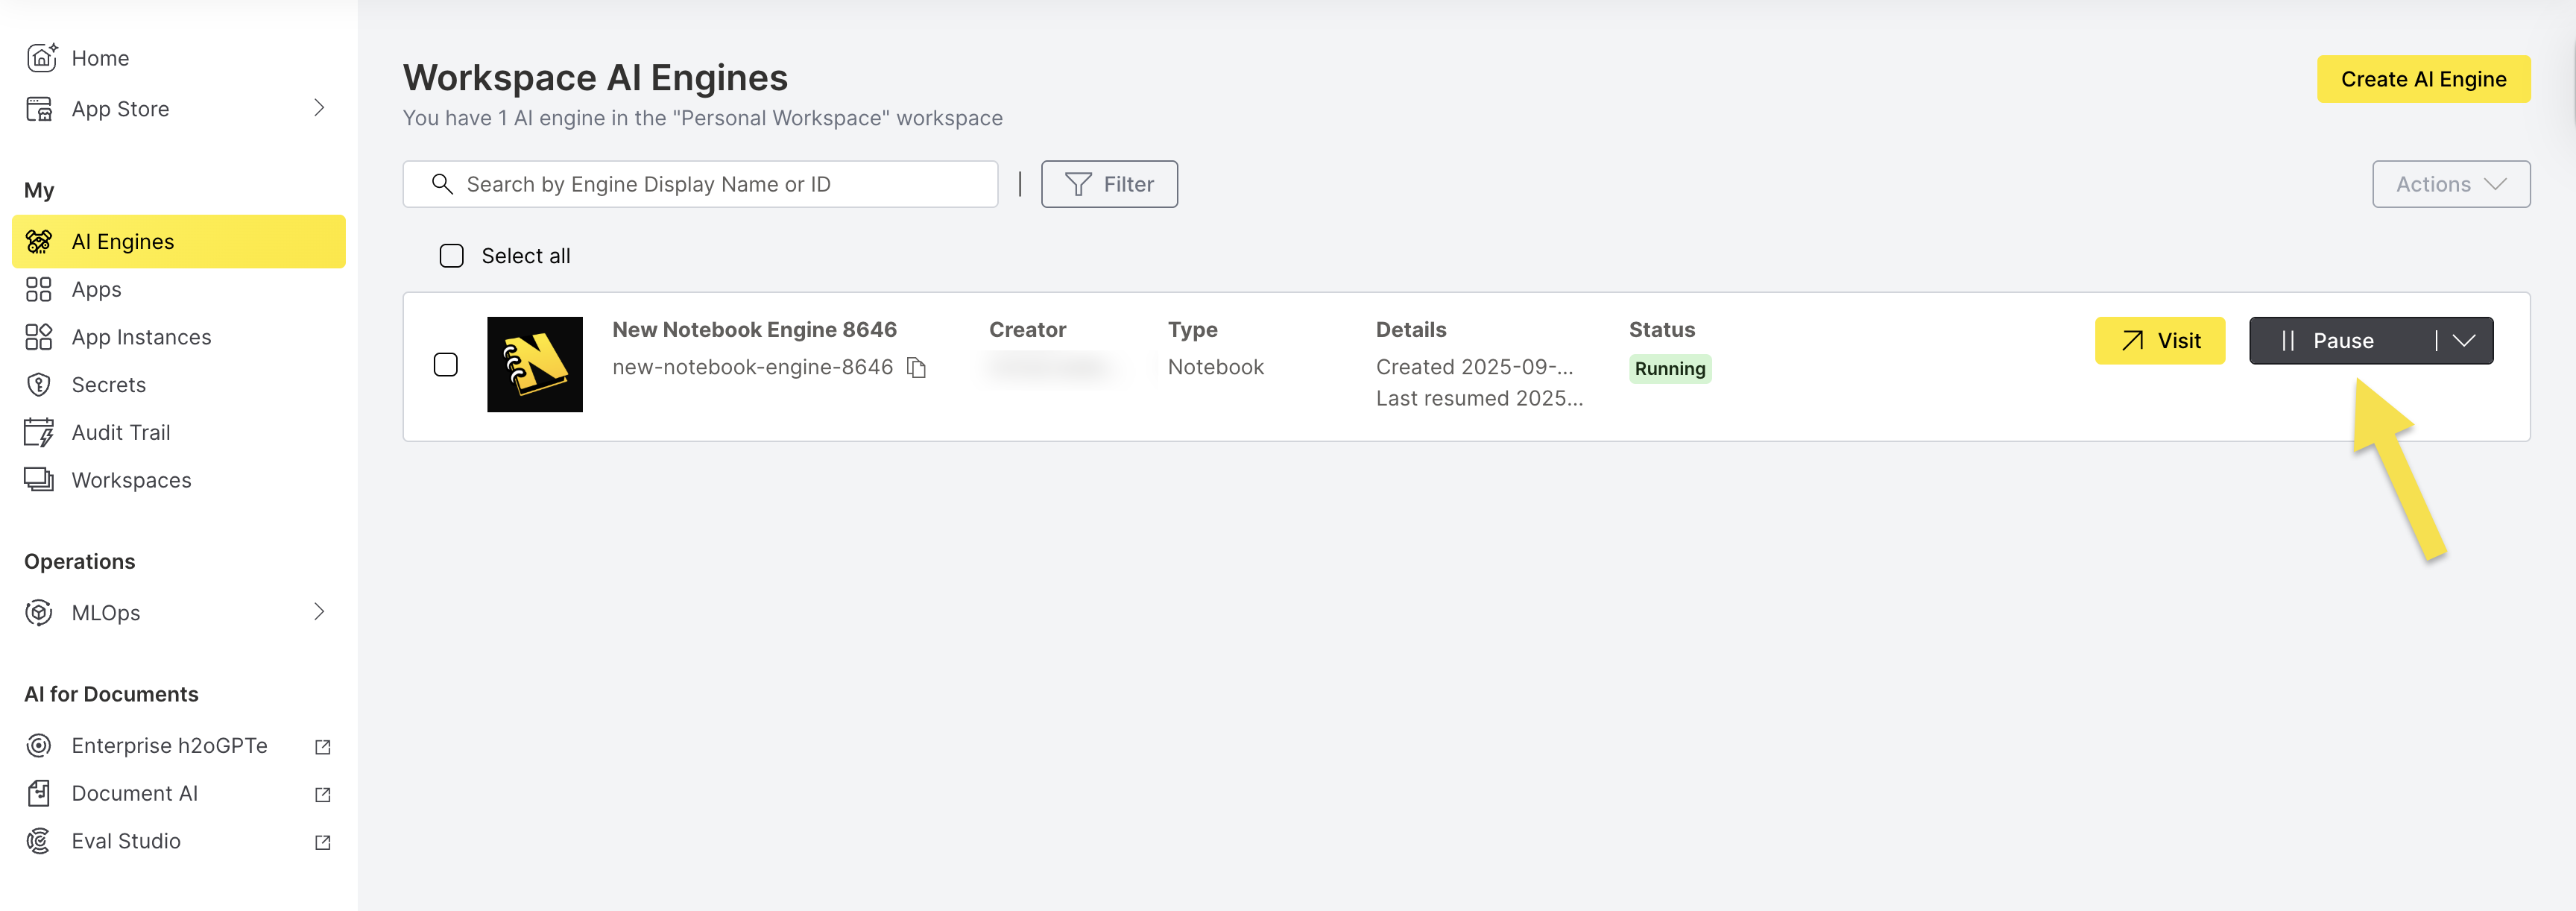
Step 2: Confirm Pause Operation
- Review the pause confirmation dialog.
- Click Pause to confirm the engine pausing operation.
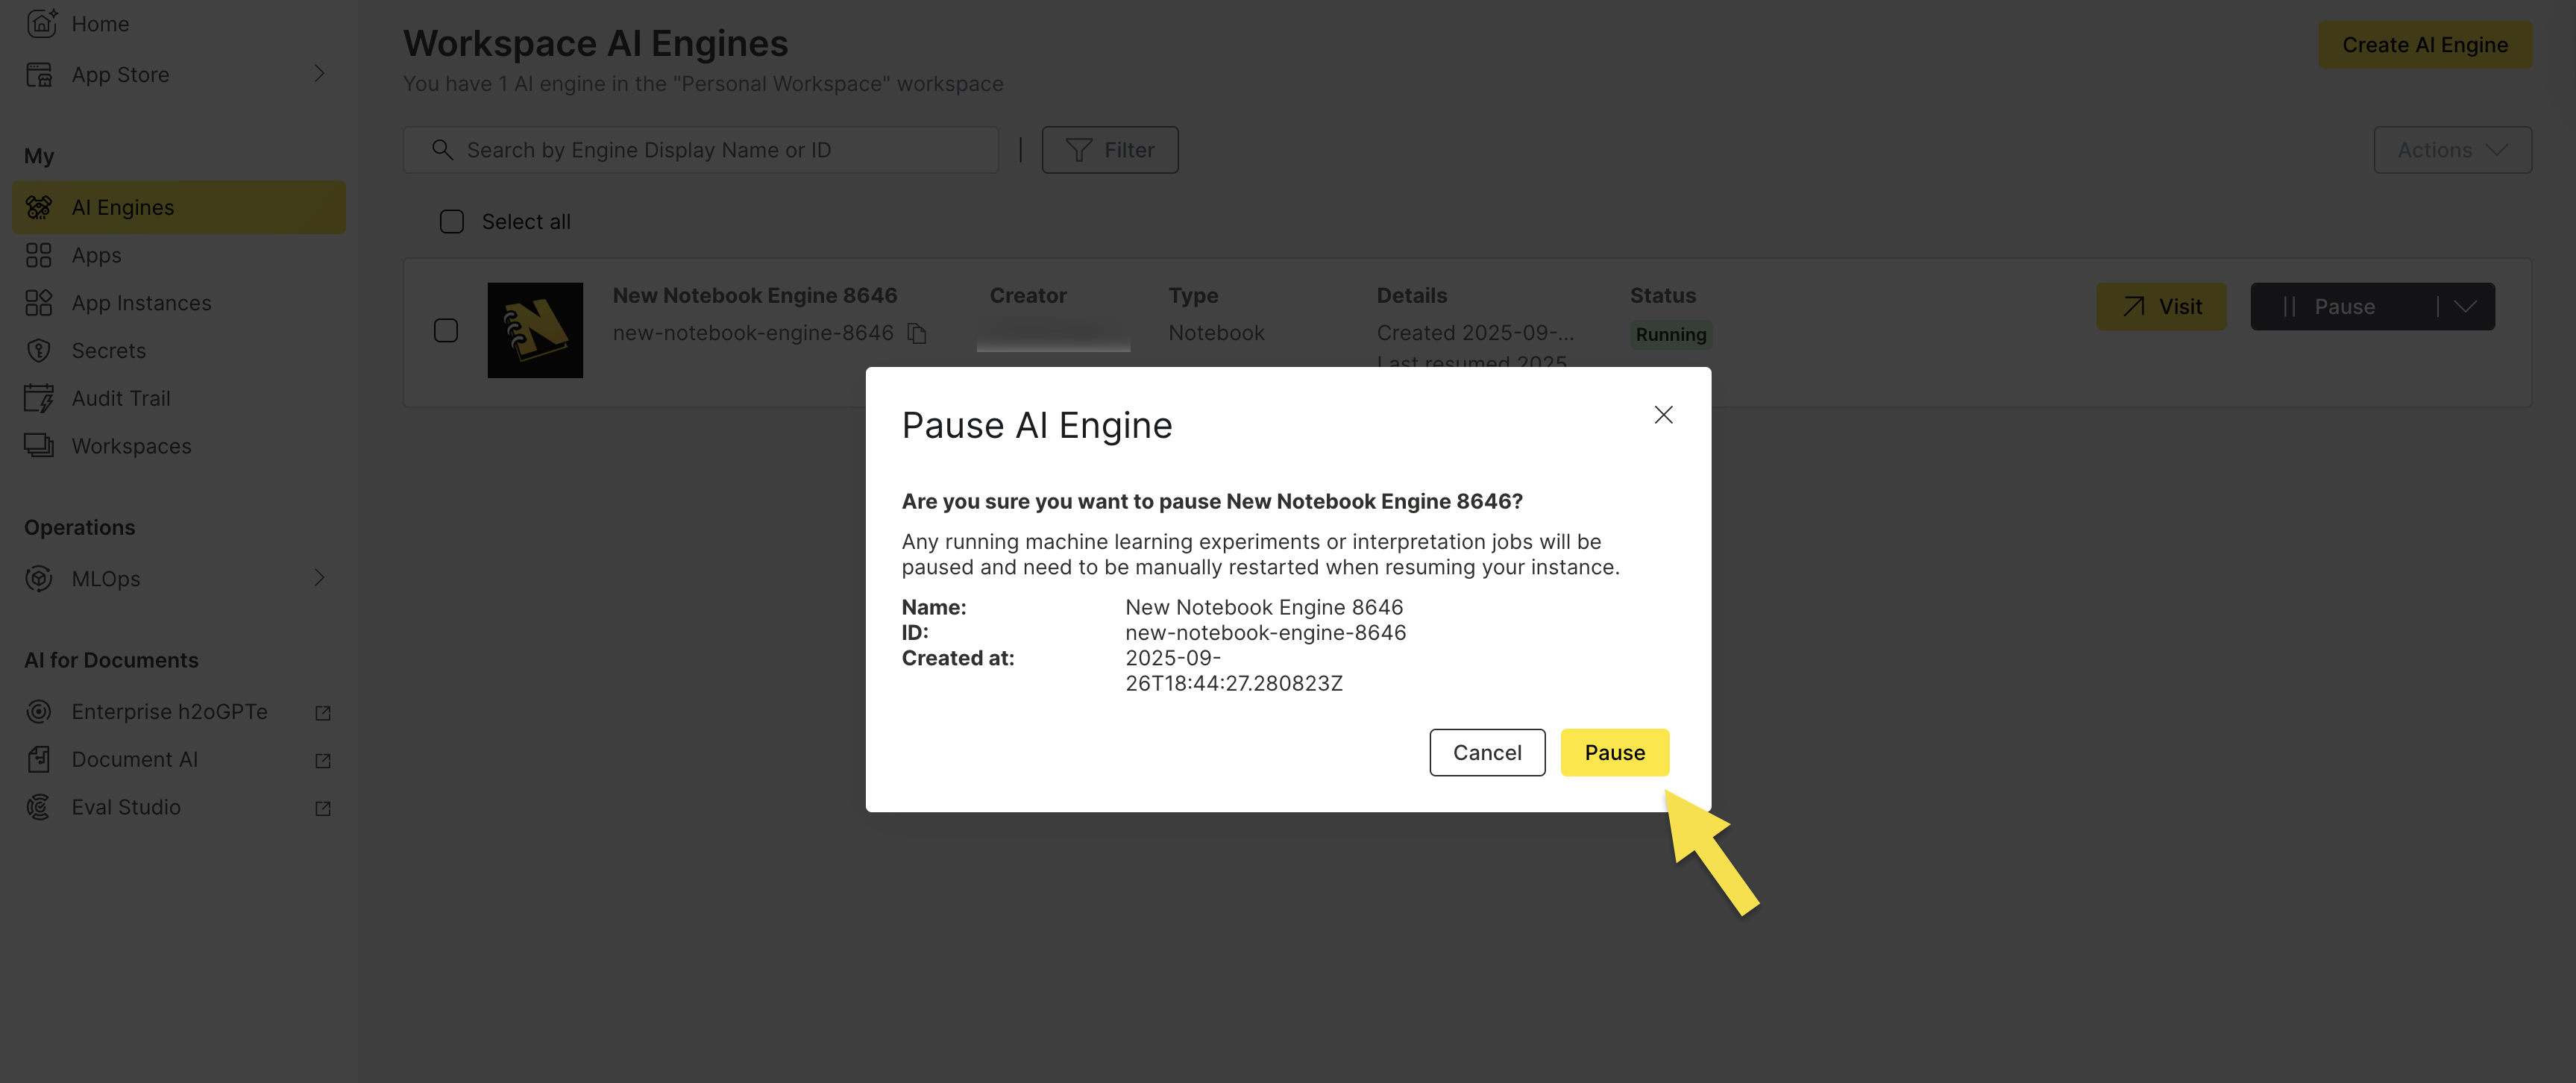
- Running kernels: All active notebook kernels and running cells are interrupted
- Data persistence: Your notebook files and data remain intact
- Manual restart: You'll need to manually restart notebook kernels when resuming the engine
- Cost optimization: Pausing reduces computational costs while preserving your work
Resume a Notebook Engine
Resuming an engine restarts all services and makes your notebook environment available for use again.
- From the AI Engines list, locate your paused Notebook Engine.
- Click Resume to restart the engine.
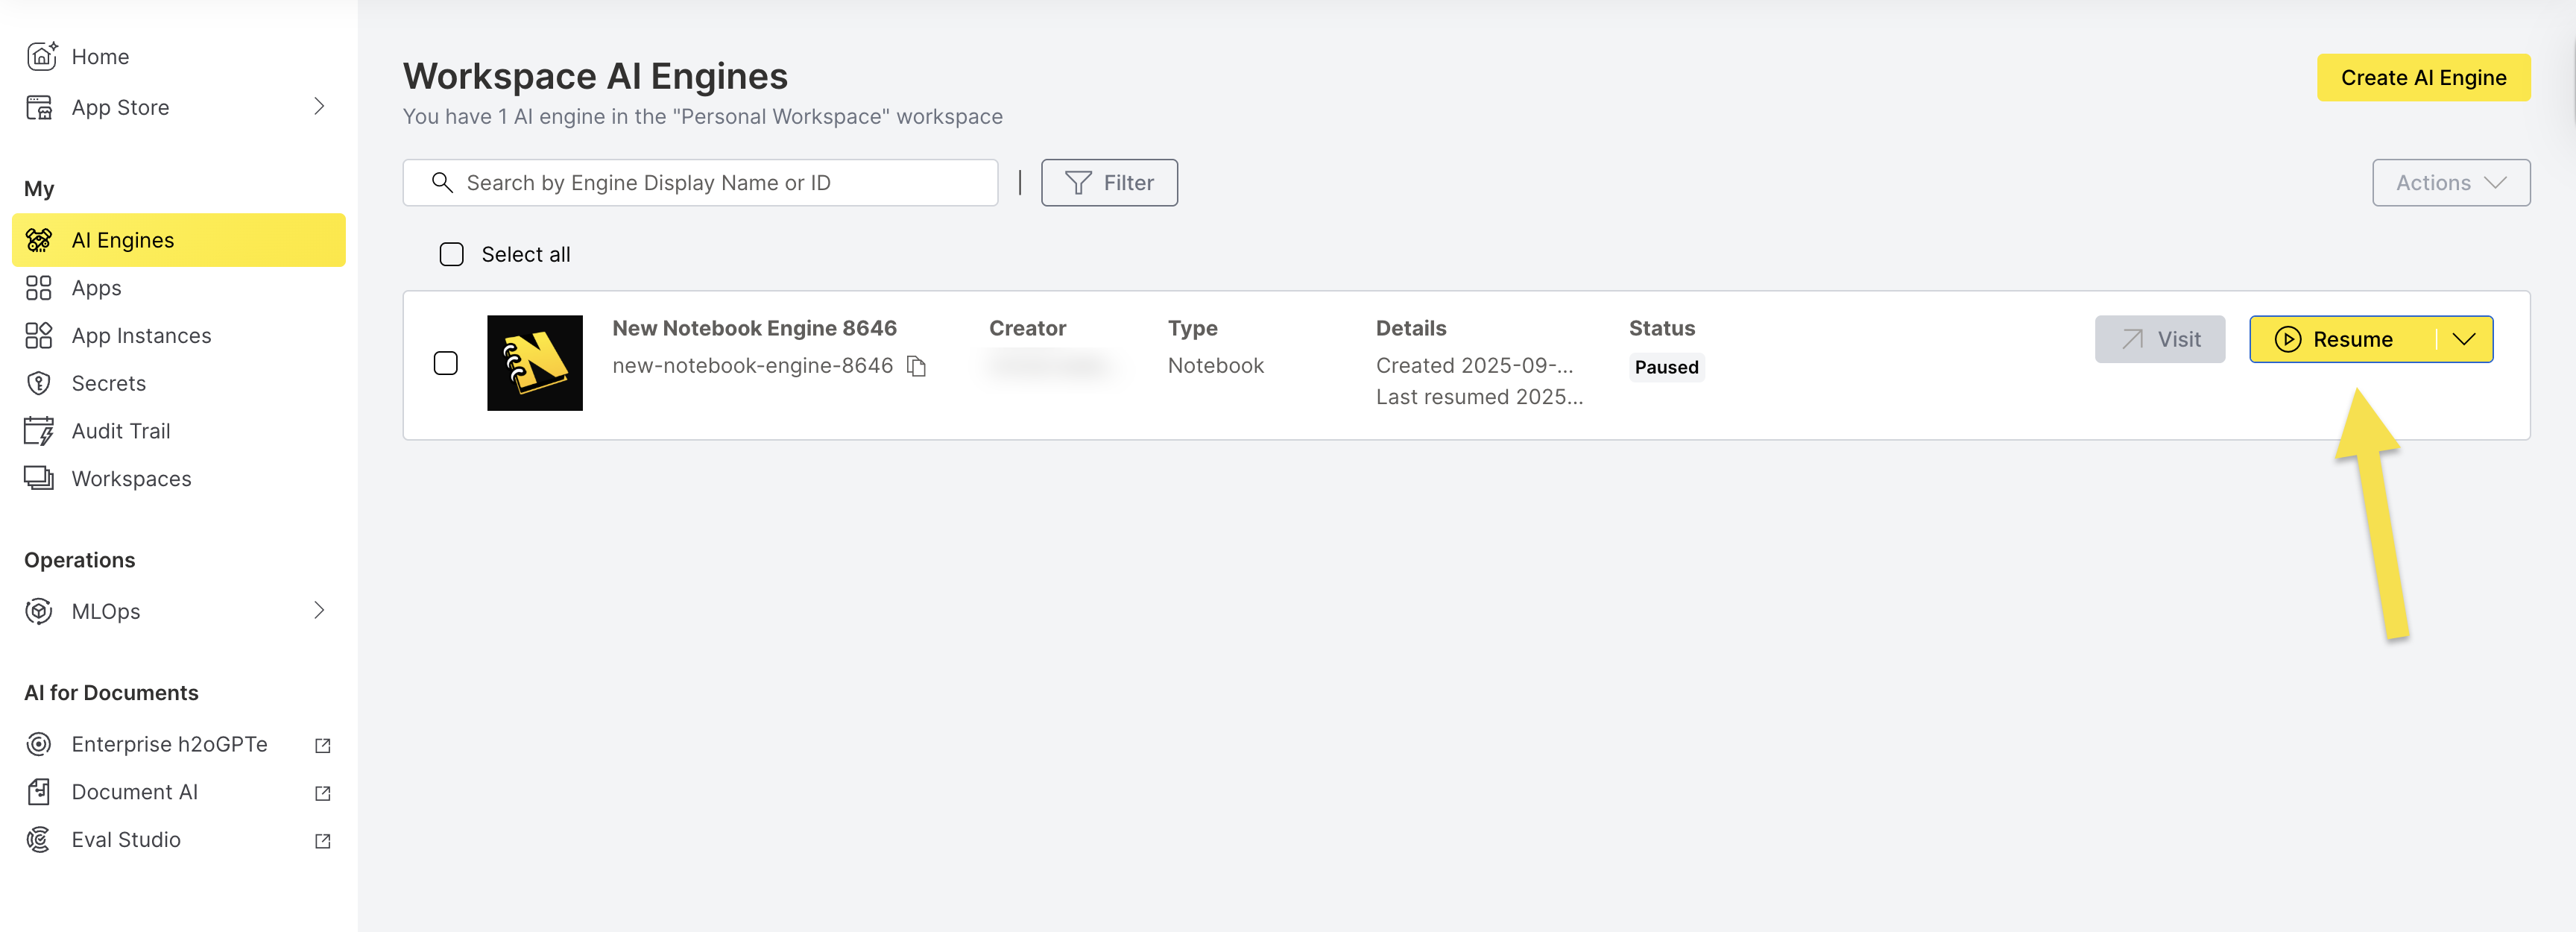
- The engine takes a few minutes to fully resume
- All services are available once the status shows Running
- Your notebook files and data are accessible again
Edit a Notebook Engine
You can edit your notebook engine configuration when it's in a paused state, including its resources, timeout settings, and the Shared setting.
To change whether an engine is shared:
- Pause the engine. See Control Engine State.
- Edit the engine and set the Shared toggle. See Step 5: Configure Shared Access for what the setting controls.
- Resume the engine.
AI Engine Manager issues your H2O AI Cloud credentials when the engine is created and each time it's resumed, so a change to Shared takes effect only after you resume the engine.
View Engine Configuration
Access Engine Details
View detailed information about your Notebook Engine configuration and status.
Step 1: Open Details View
- From the AI Engines list, locate your Notebook Engine.
- In the engine's row, click the dropdown arrow next to Pause or Resume.
- Select View Details to access the engine information.
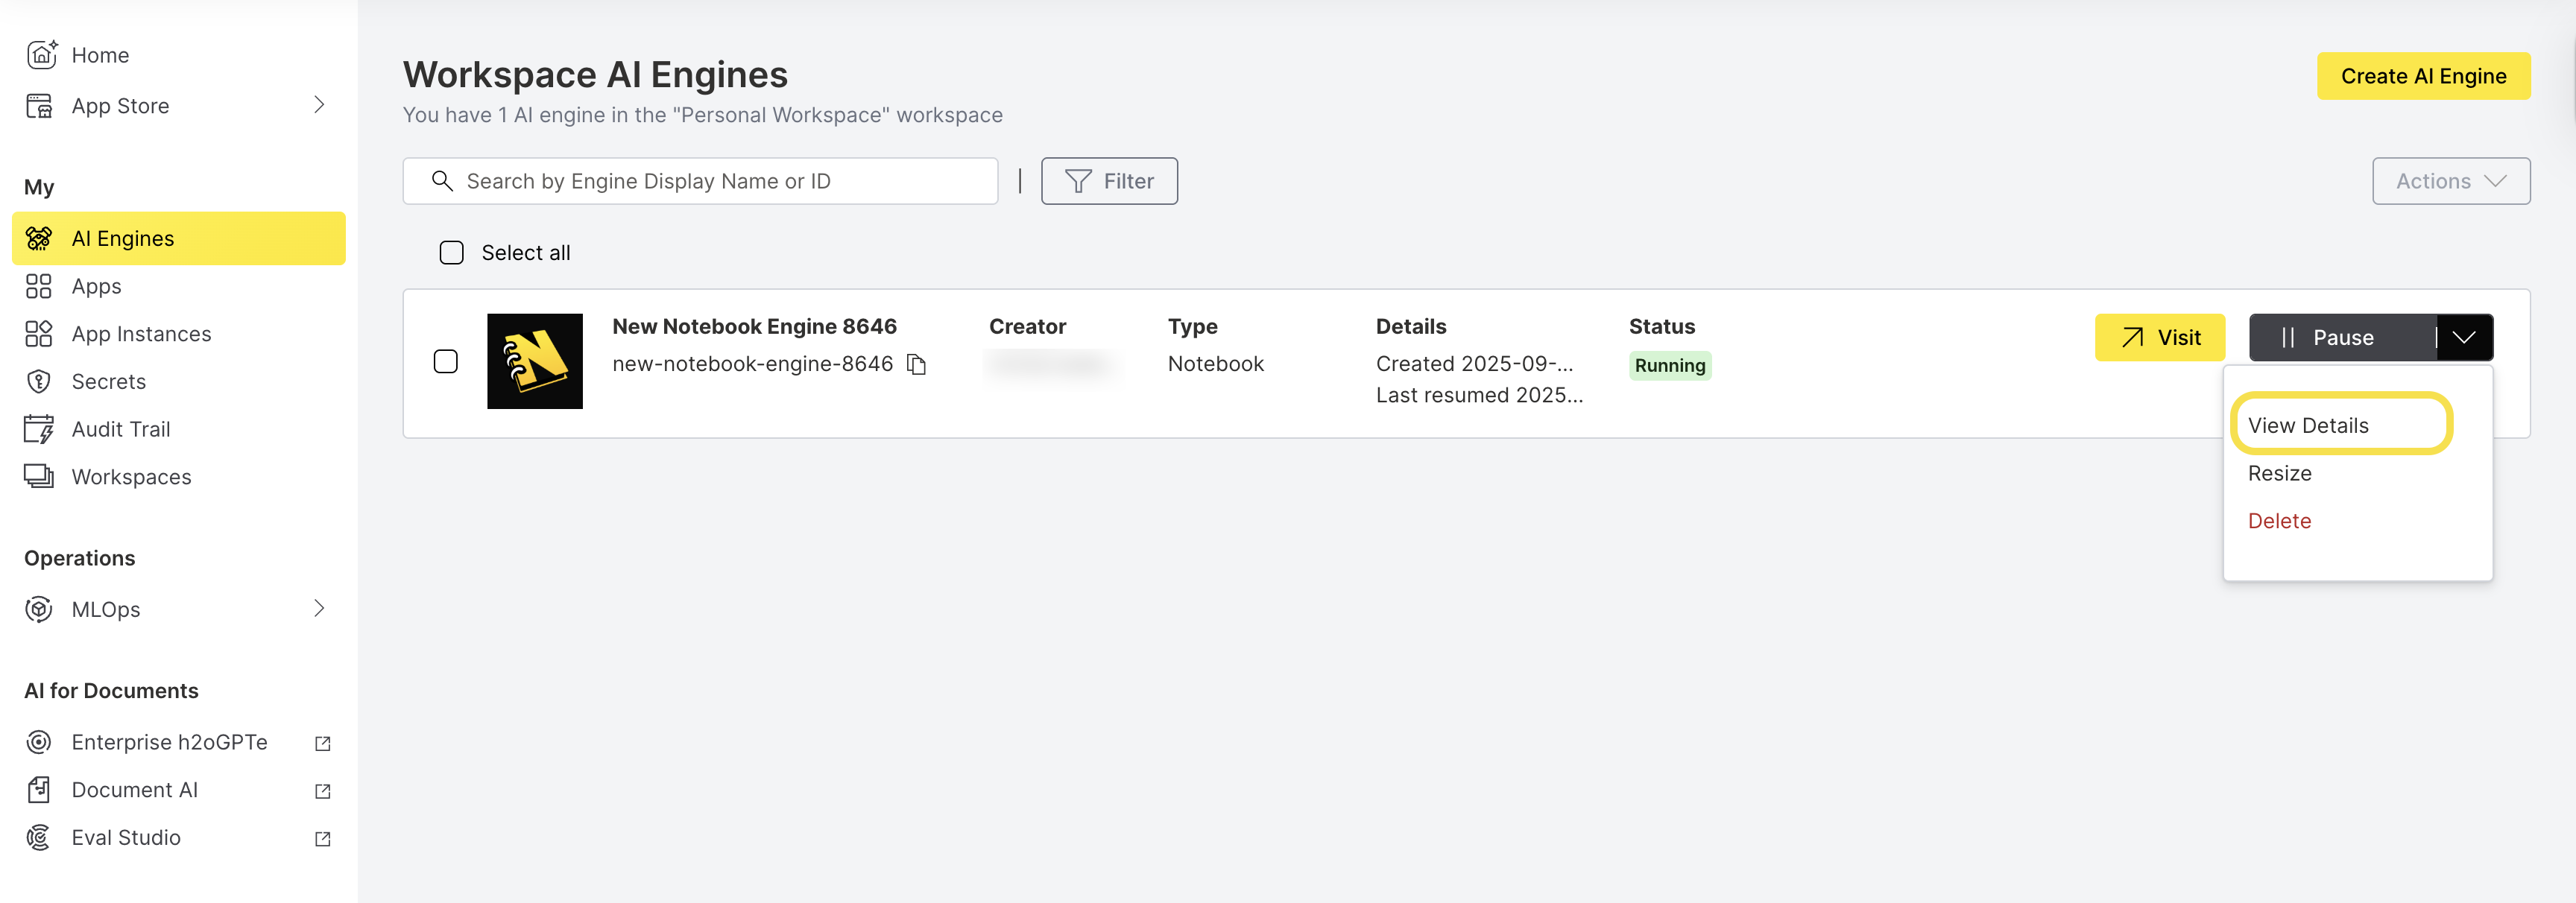
Engine Details Overview
The Engine Details panel displays comprehensive information about your engine:
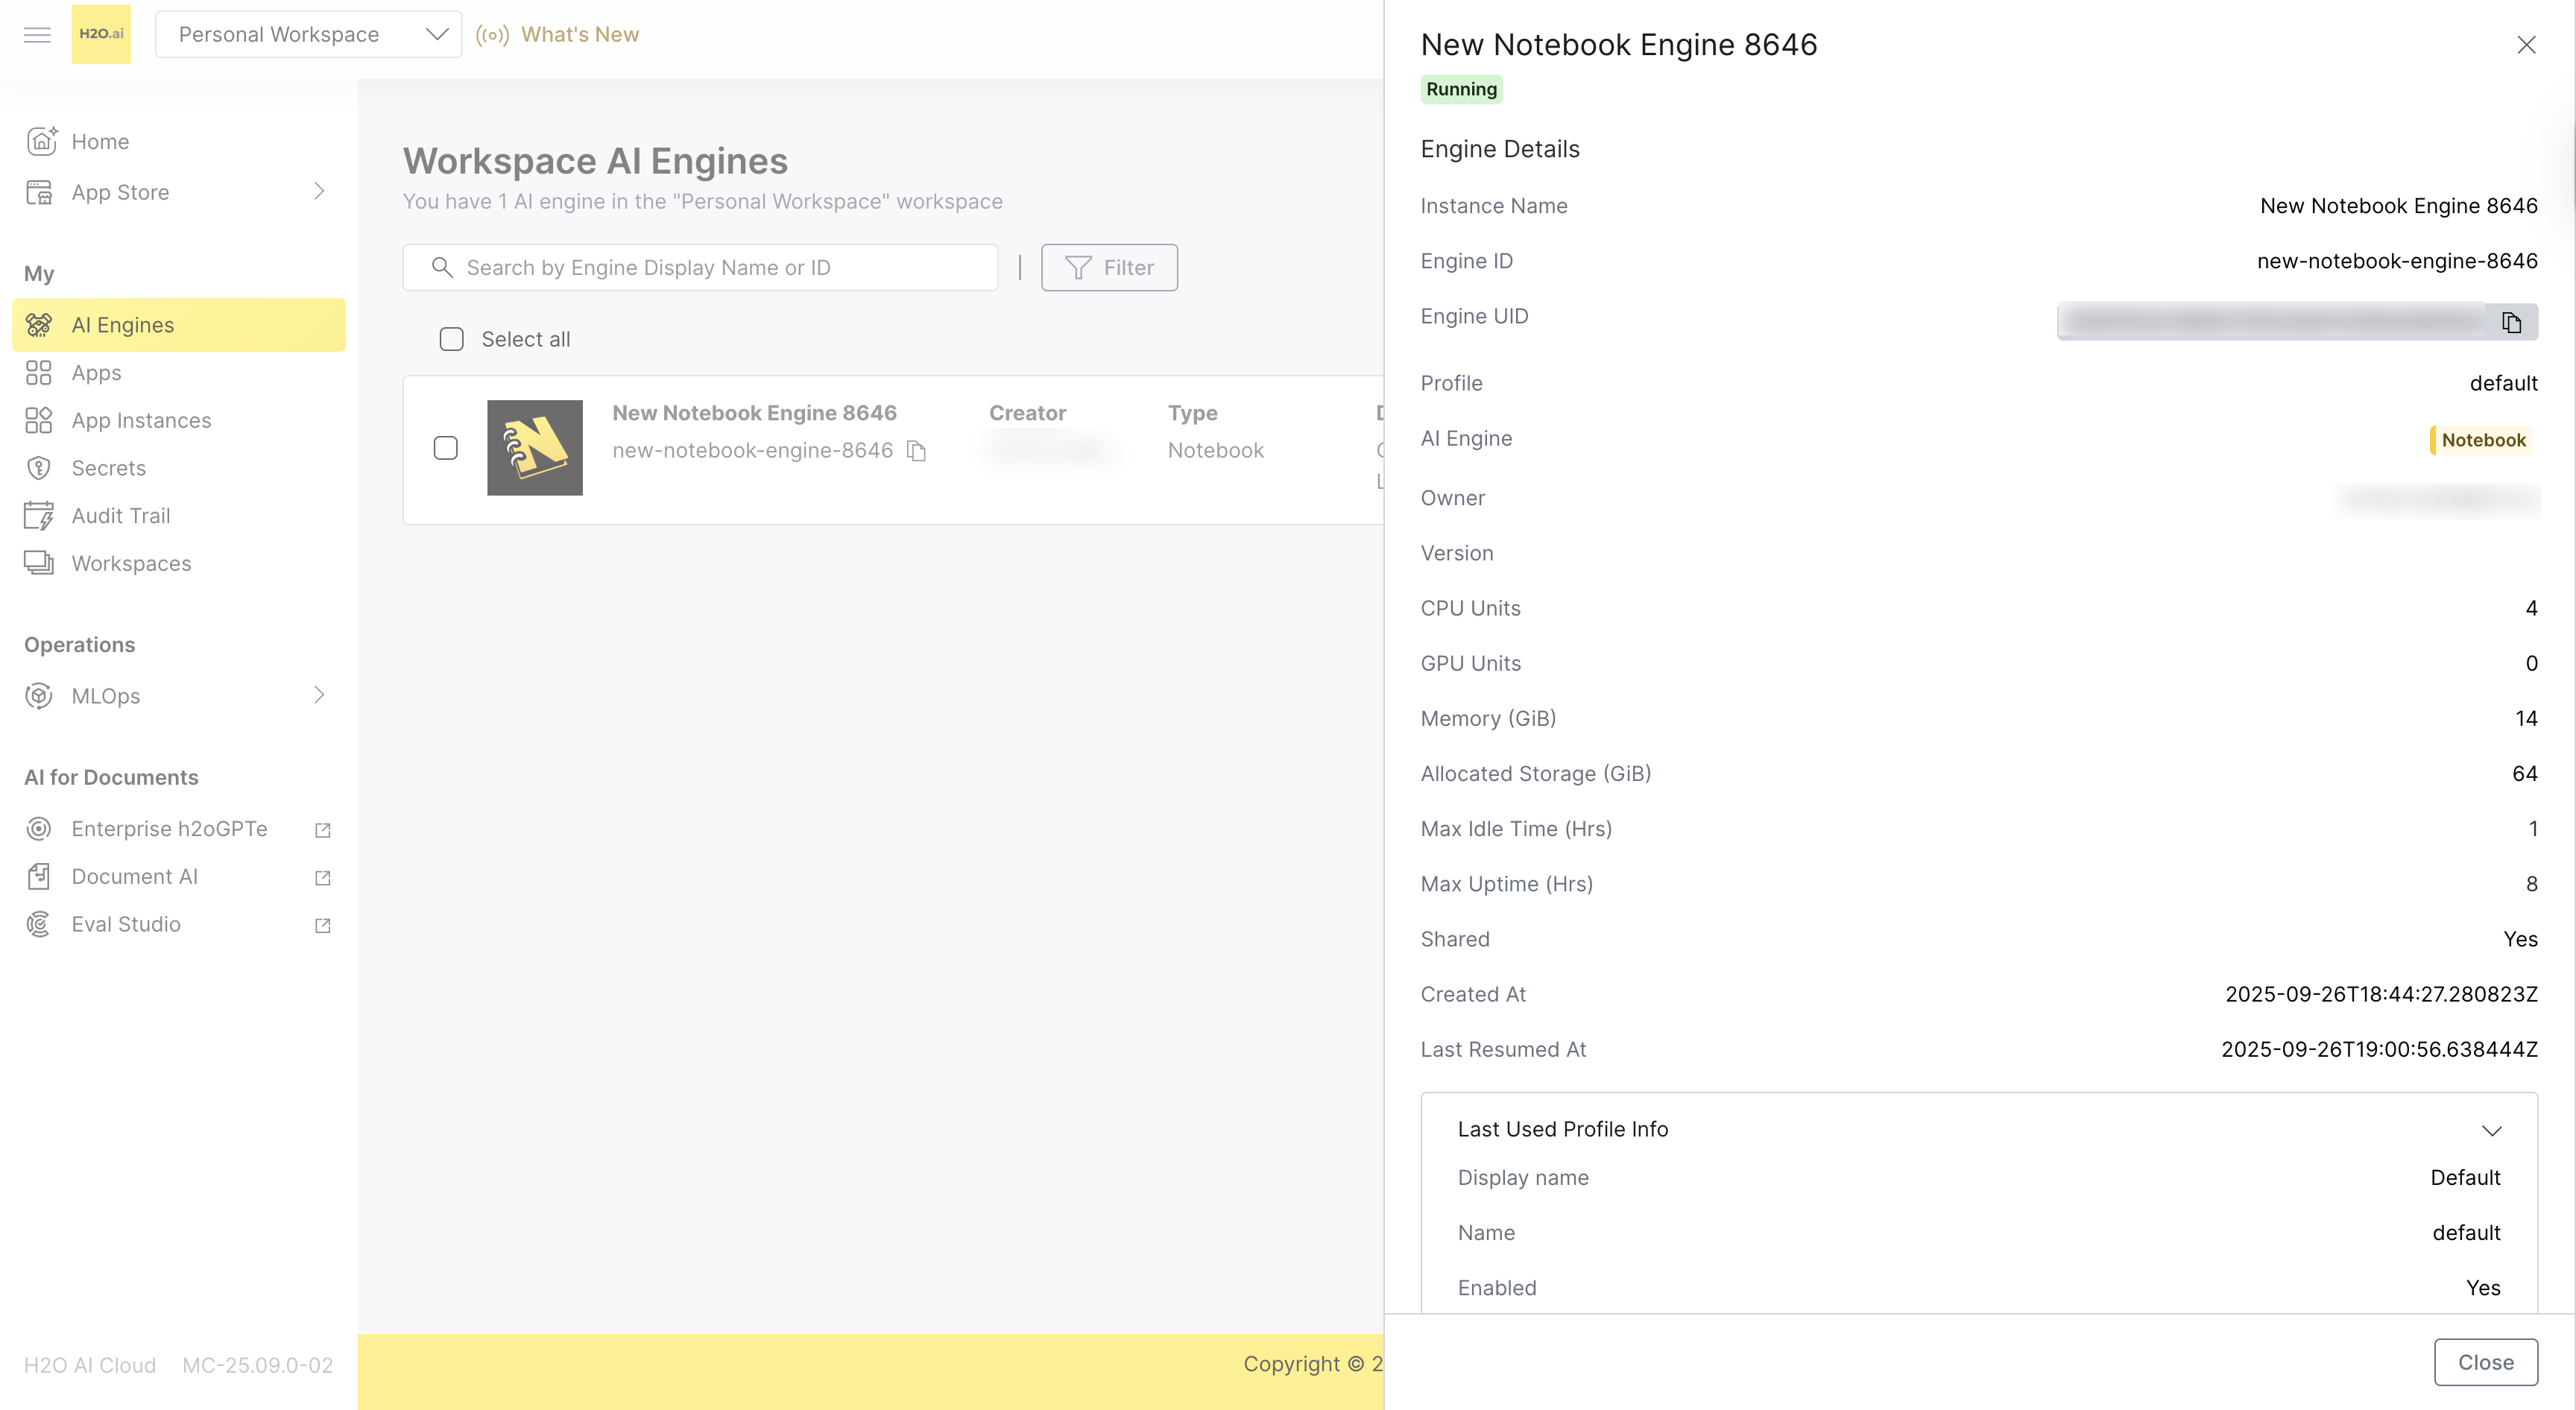
| Field | Description |
|---|---|
| Instance Name | The display name of your engine instance |
| Engine ID | The unique identifier for the engine |
| Engine UID | The unique universal identifier (with copy-to-clipboard button) |
| Profile | The engine profile configuration, for example default |
| AI Engine | The type of AI engine (Notebook) displayed in a tag |
| Owner | Email address of the engine creator/owner |
| Version | The engine version (empty for Notebook Engines, which are versioned by their image) |
| CPU Units | Number of CPU units allocated to the engine |
| GPU Units | Number of GPU units allocated to the engine |
| Memory (GiB) | Amount of memory allocated in gigabytes |
| Allocated Storage (GiB) | Total storage capacity allocated to the engine |
| Max Idle Time (Hrs) | Maximum idle time before automatic pausing |
| Max Uptime (Hrs) | Maximum uptime before automatic pausing |
| Shared | Whether any user who can access engines in your workspace can open, change, and delete files in this engine and run code in it |
| Created At | Date and time when the engine was created (ISO format) |
| Last Resumed At | Date and time of the last resume operation (ISO format) |
Additional Configuration Sections
The Engine Details panel also includes an expandable section:
Last Used Profile Info
- Detailed profile configuration information including:
- Profile display name and internal name
- Enablement status and priority
- OIDC role assignments
- Resource constraints (CPU, GPU, Memory, Storage limits)
- Timeout configurations (Idle and Running duration limits)
- GPU Resource Name
- Yaml Pod Template Specification and GPU tolerations
Resize a Notebook Engine
You can increase the storage allocated to your notebook engine. The resize dialog changes storage only; CPU, GPU, and memory aren't part of it.
- From the AI Engines list, locate your Notebook Engine.
- In the engine's row, click the dropdown arrow next to Pause or Resume.
- Select Resize to access the resize interface.
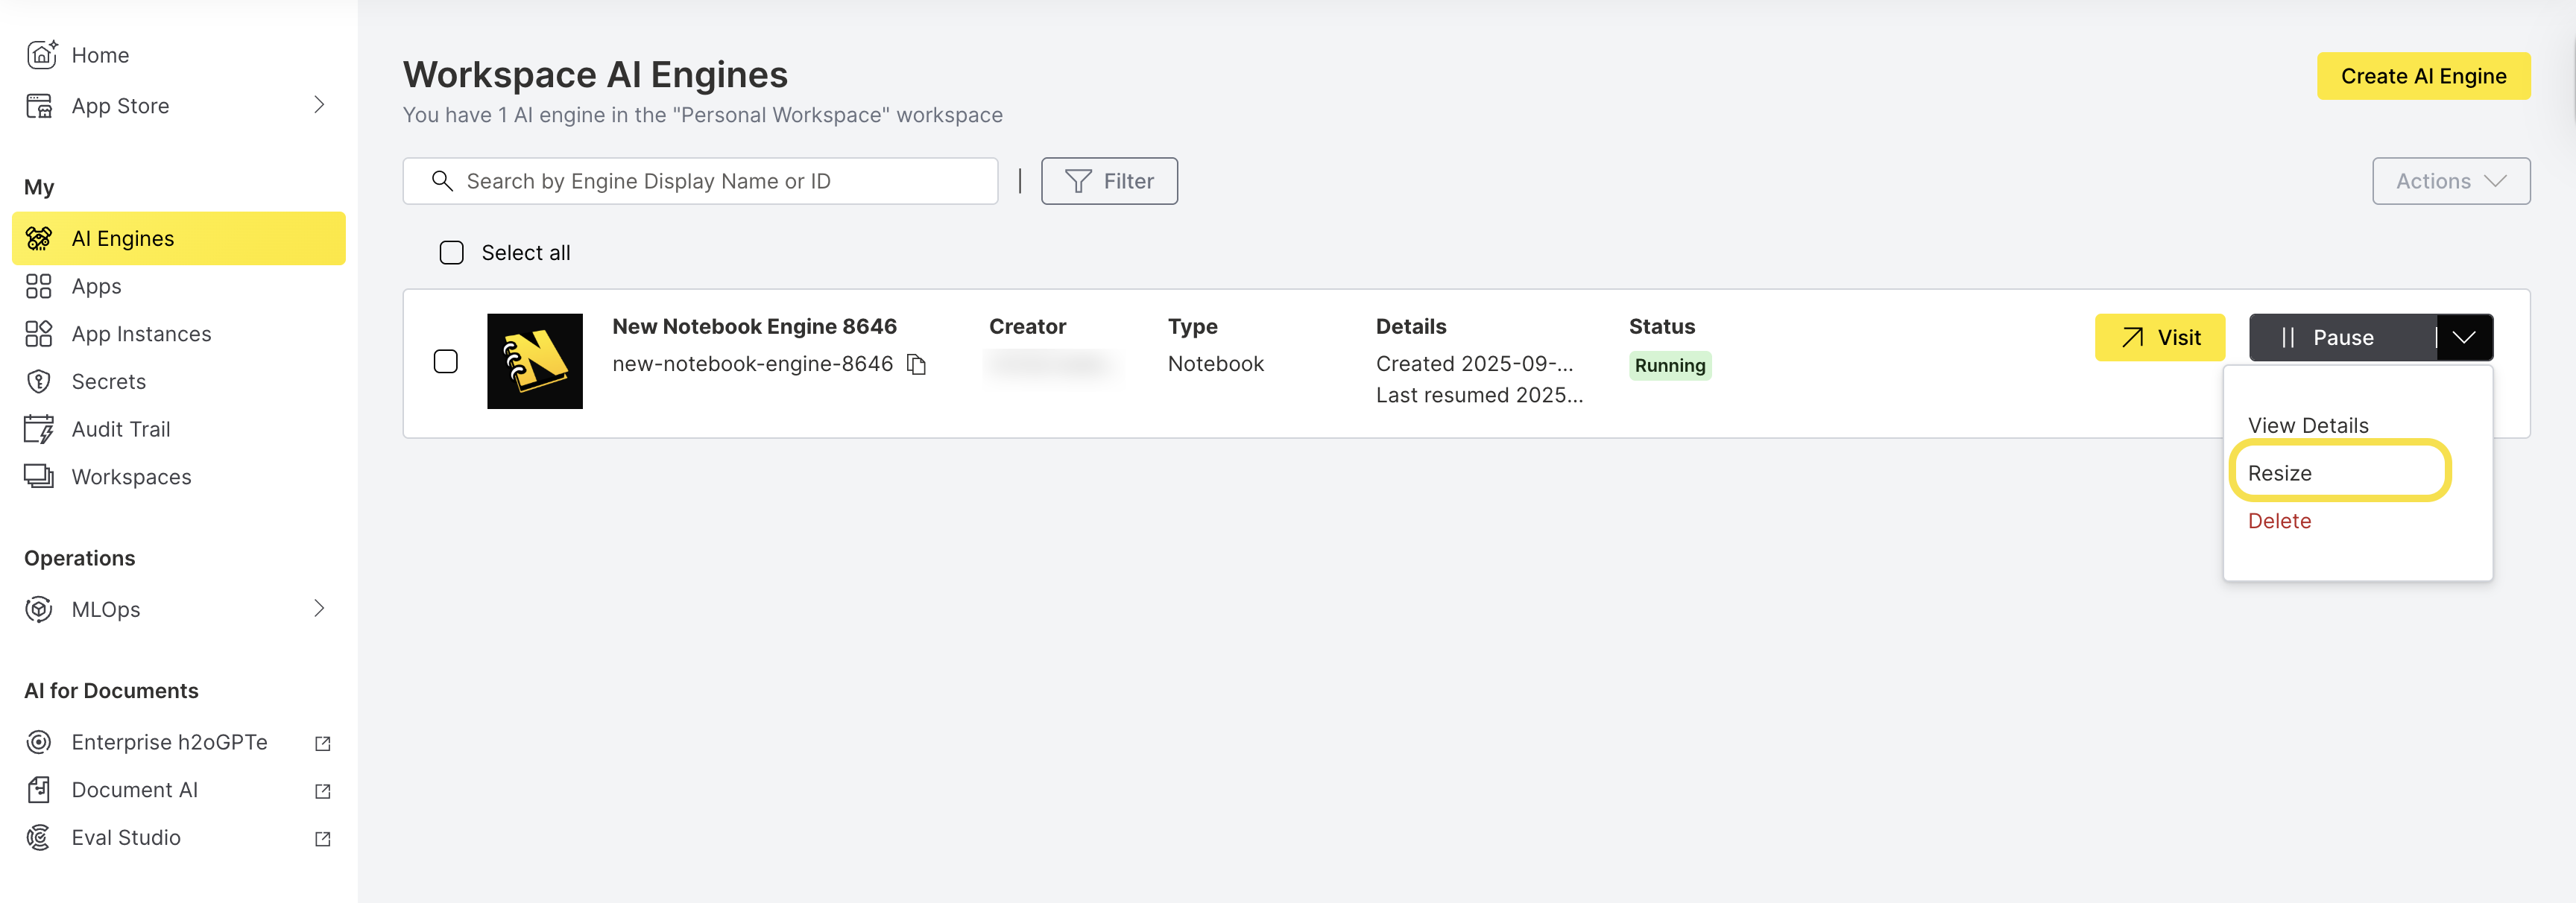
- Adjust the Storage capacity as needed.
- Review the changes and click Resize to resize the engine.
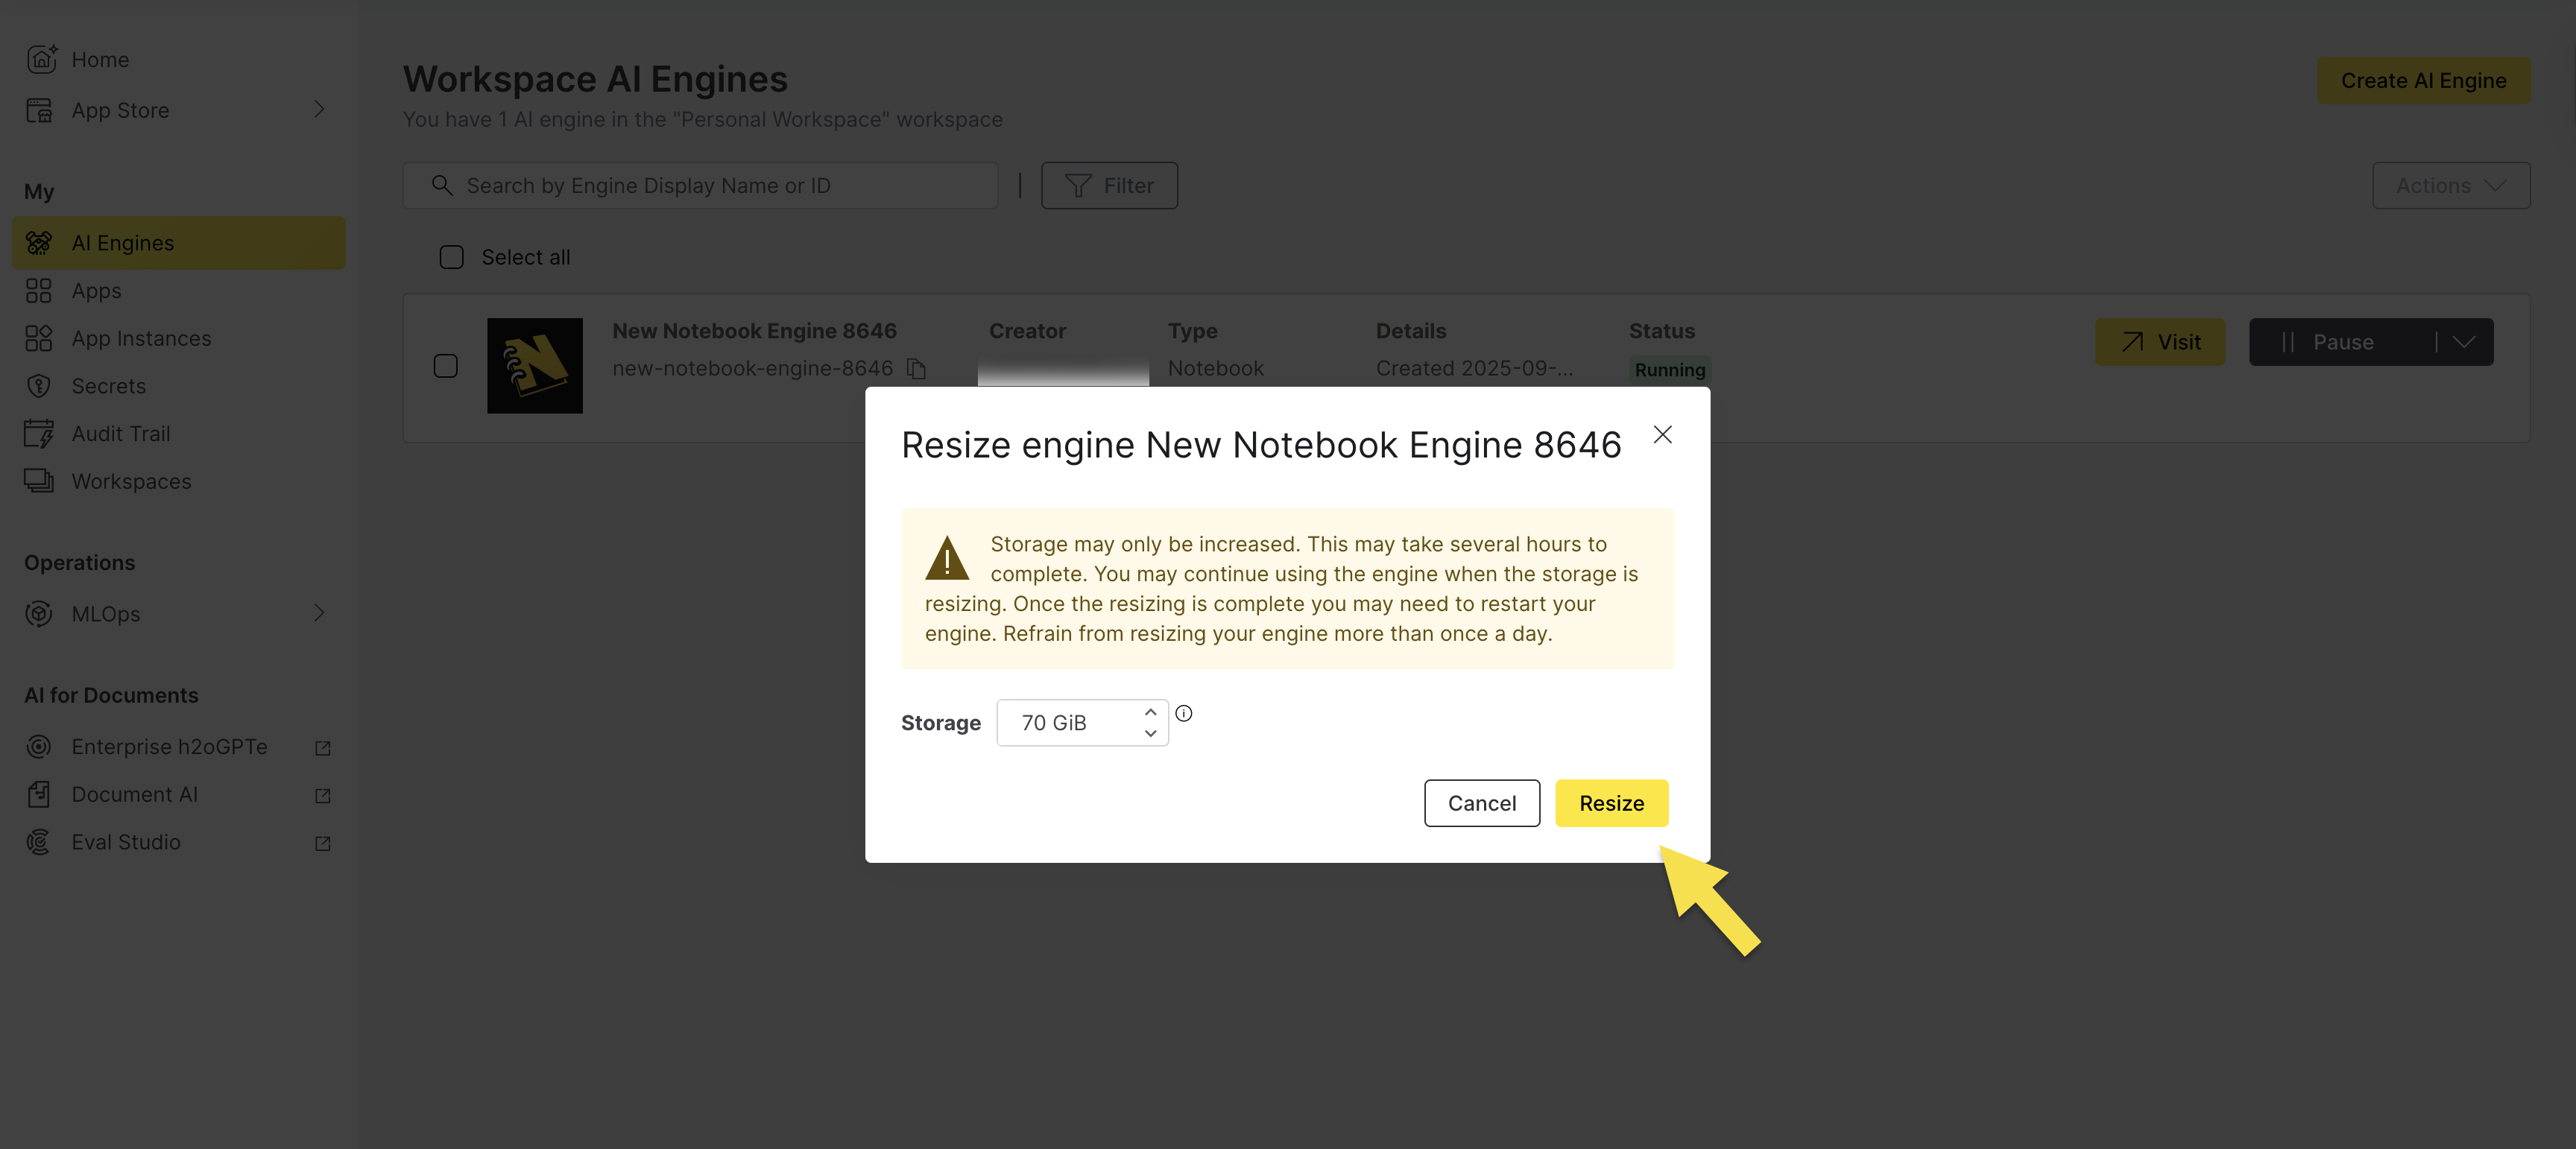
- Storage may only be increased. This may take several hours to complete.
- You may continue using the engine when the storage is resizing.
- Once the resizing is complete, you may need to restart your engine.
- Refrain from resizing your engine more than once a day.
Delete a Notebook Engine
Deleting an engine permanently removes it and all associated data. This action cannot be undone.
Deleting a Notebook Engine permanently removes:
- All engine configurations and settings
- All notebook files and data
Make sure you have backed up any important data before you continue.
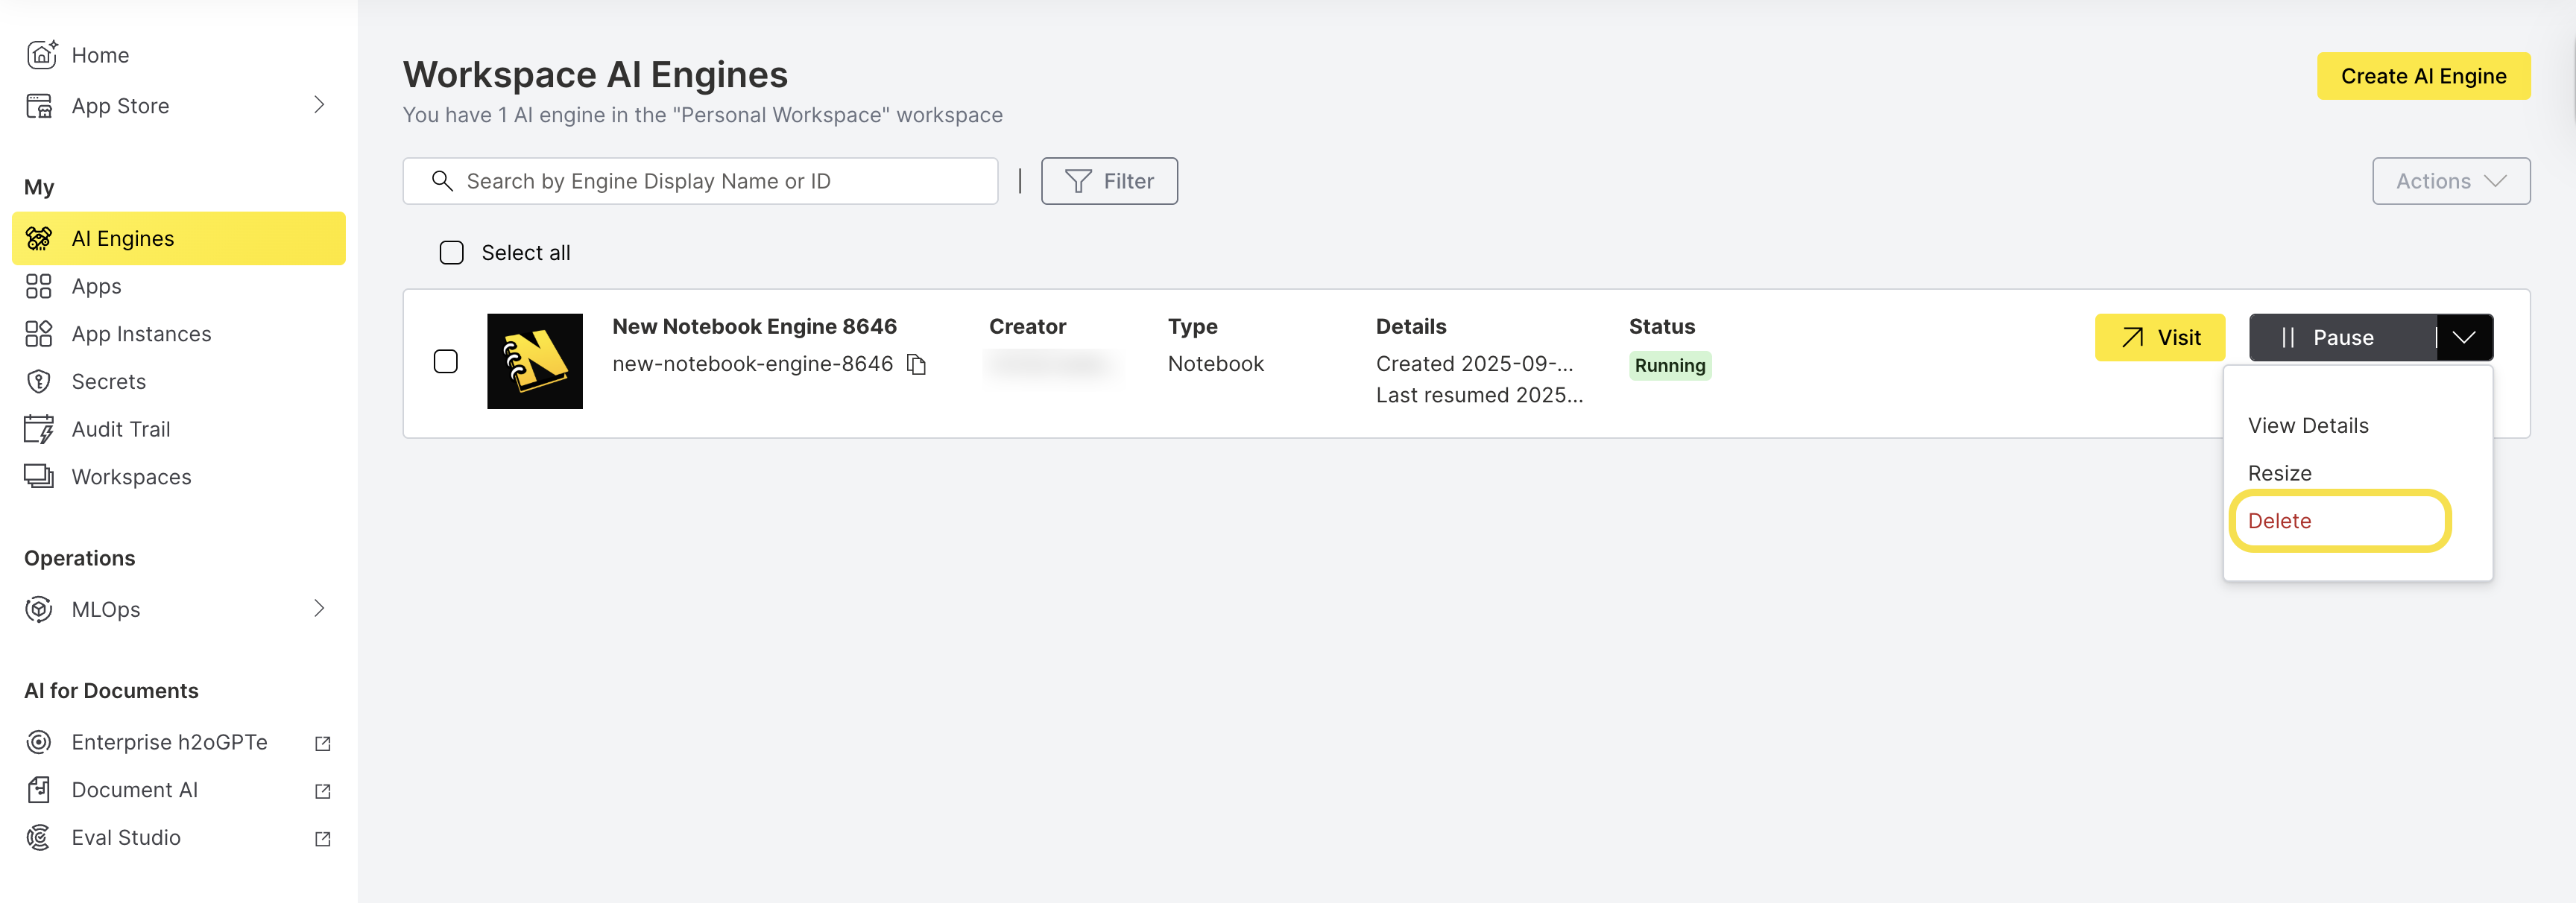
Step 1: Initiate Deletion
- From the AI Engines list, locate your Notebook Engine.
- In the engine's row, click the dropdown arrow next to Pause or Resume.
- Select Delete to initiate the deletion process.
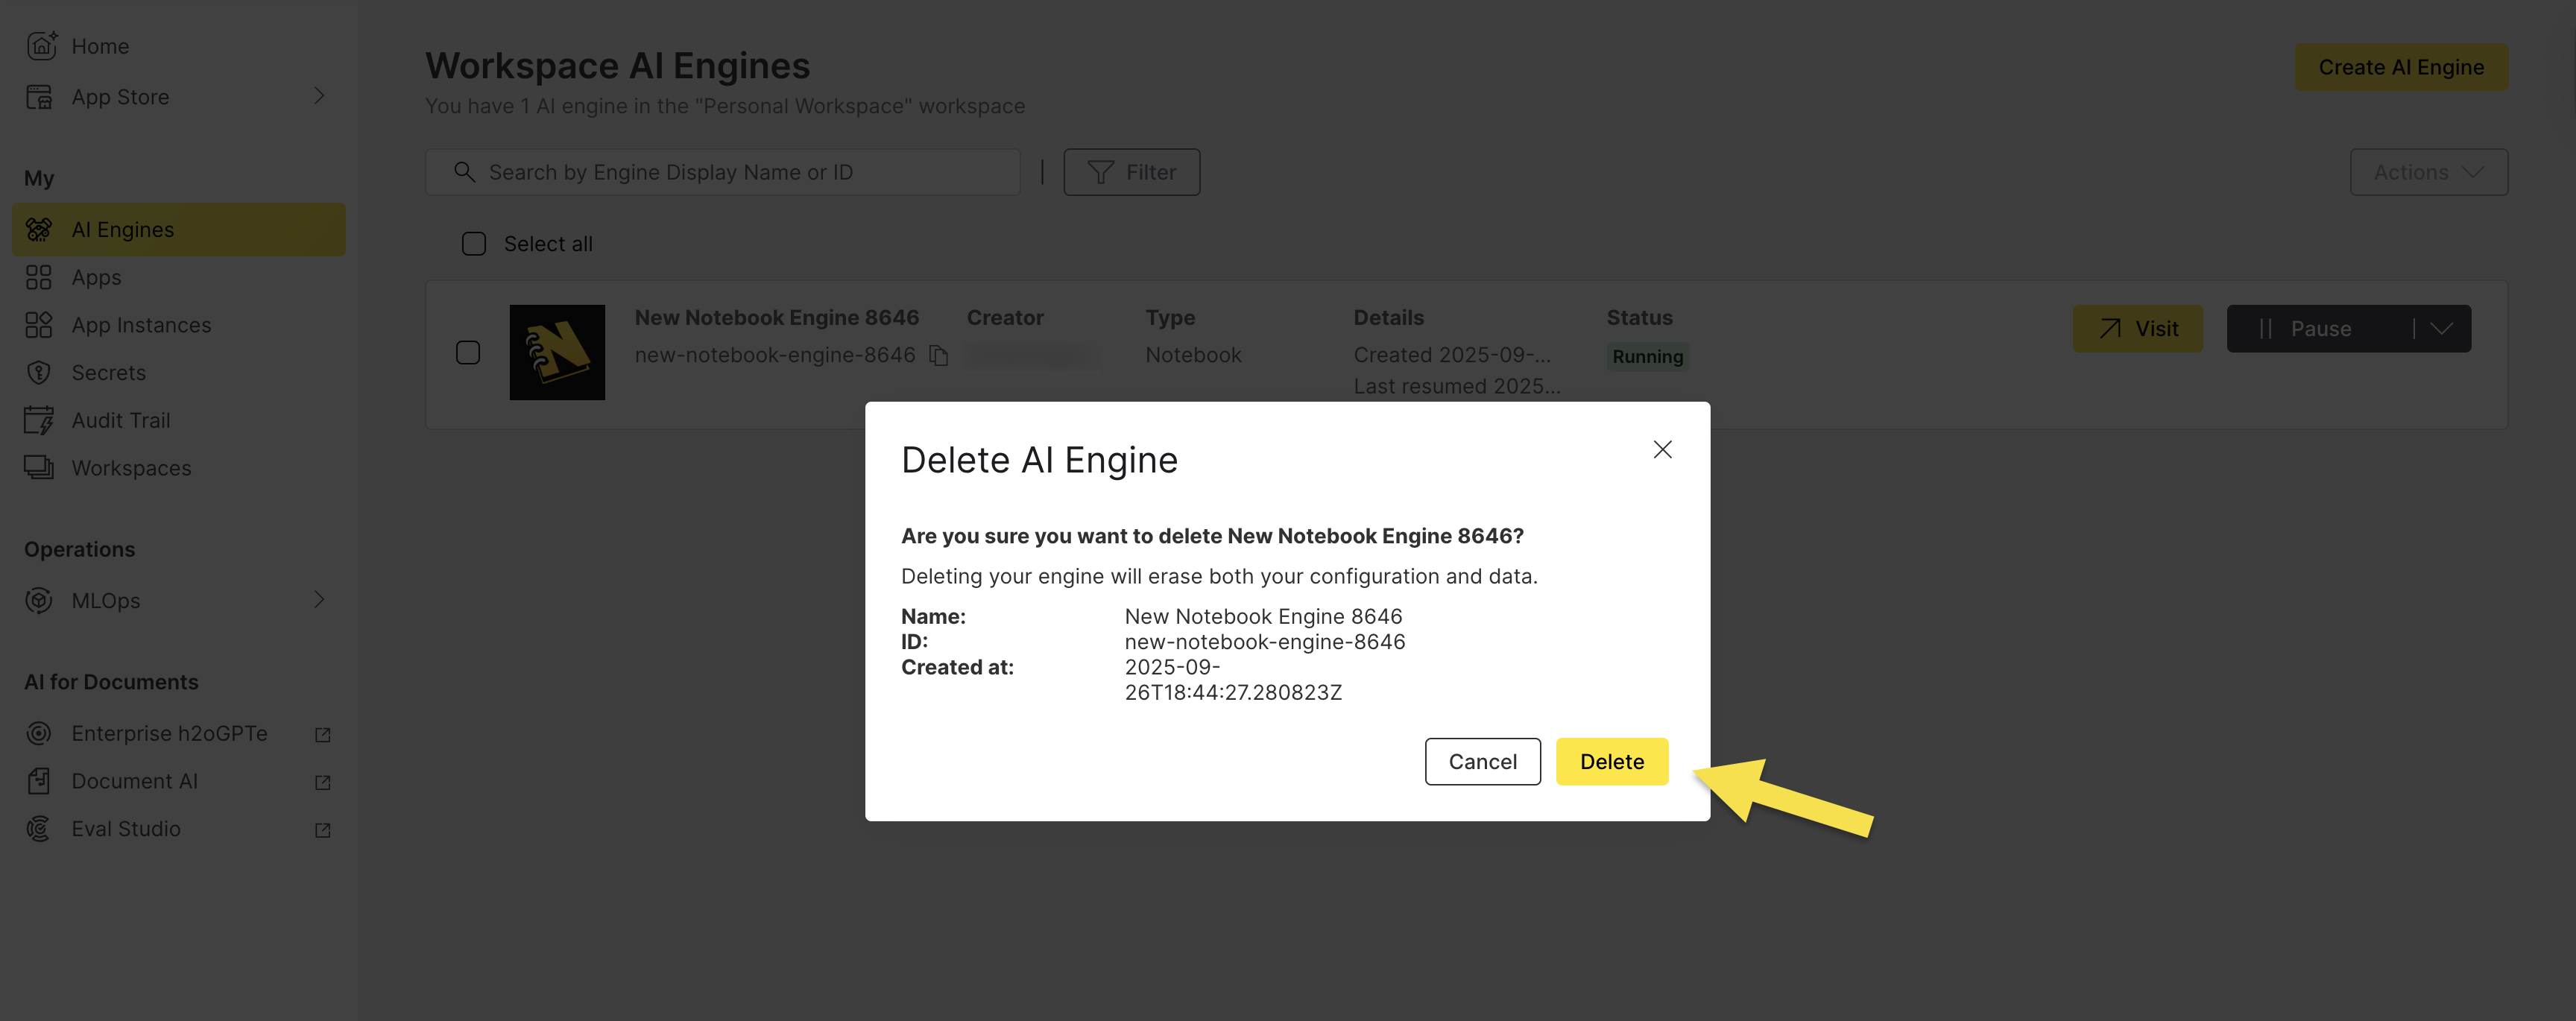
Step 2: Confirm Deletion
- Verify you have backed up any important data.
- Click Delete to confirm the engine deletion.
- The engine is removed from your AI Engines list
- All associated resources are deallocated
- Storage costs stop immediately
- The engine ID becomes available for reuse
- Submit and view feedback for this page
- Send feedback about AI Engine Manager to cloud-feedback@h2o.ai