Create a new Driverless AI Engine
This guide walks you through creating a new Driverless AI Engine via the H2O AI Cloud web interface.
What is Driverless AI?
Driverless AI is an automated machine learning platform that provides:
- Automation of the machine learning process
- Feature creation and selection
- Algorithm selection and hyperparameter tuning
- Built-in explainability and model insights
- Deployment and monitoring capabilities
- Integration with h2oGPTe for advanced AI Agents capabilities
For more information about Driverless AI capabilities, features, and use cases, see the official Driverless AI documentation.
Prerequisites
Before creating a Driverless AI Engine, ensure you have:
- Access to H2O AI Cloud web UI. See Access AI Engines for details.
- Appropriate permissions allocated to your workspace. Contact your administrator or the H2O support team for more details.
- (Optional) Resource requirements: Driverless AI engines typically require significant computational resources. Consider your data size and model complexity when configuring resources.
Create a new Driverless AI Engine
To set up a Driverless AI Engine using the H2O Cloud user interface, follow these steps:
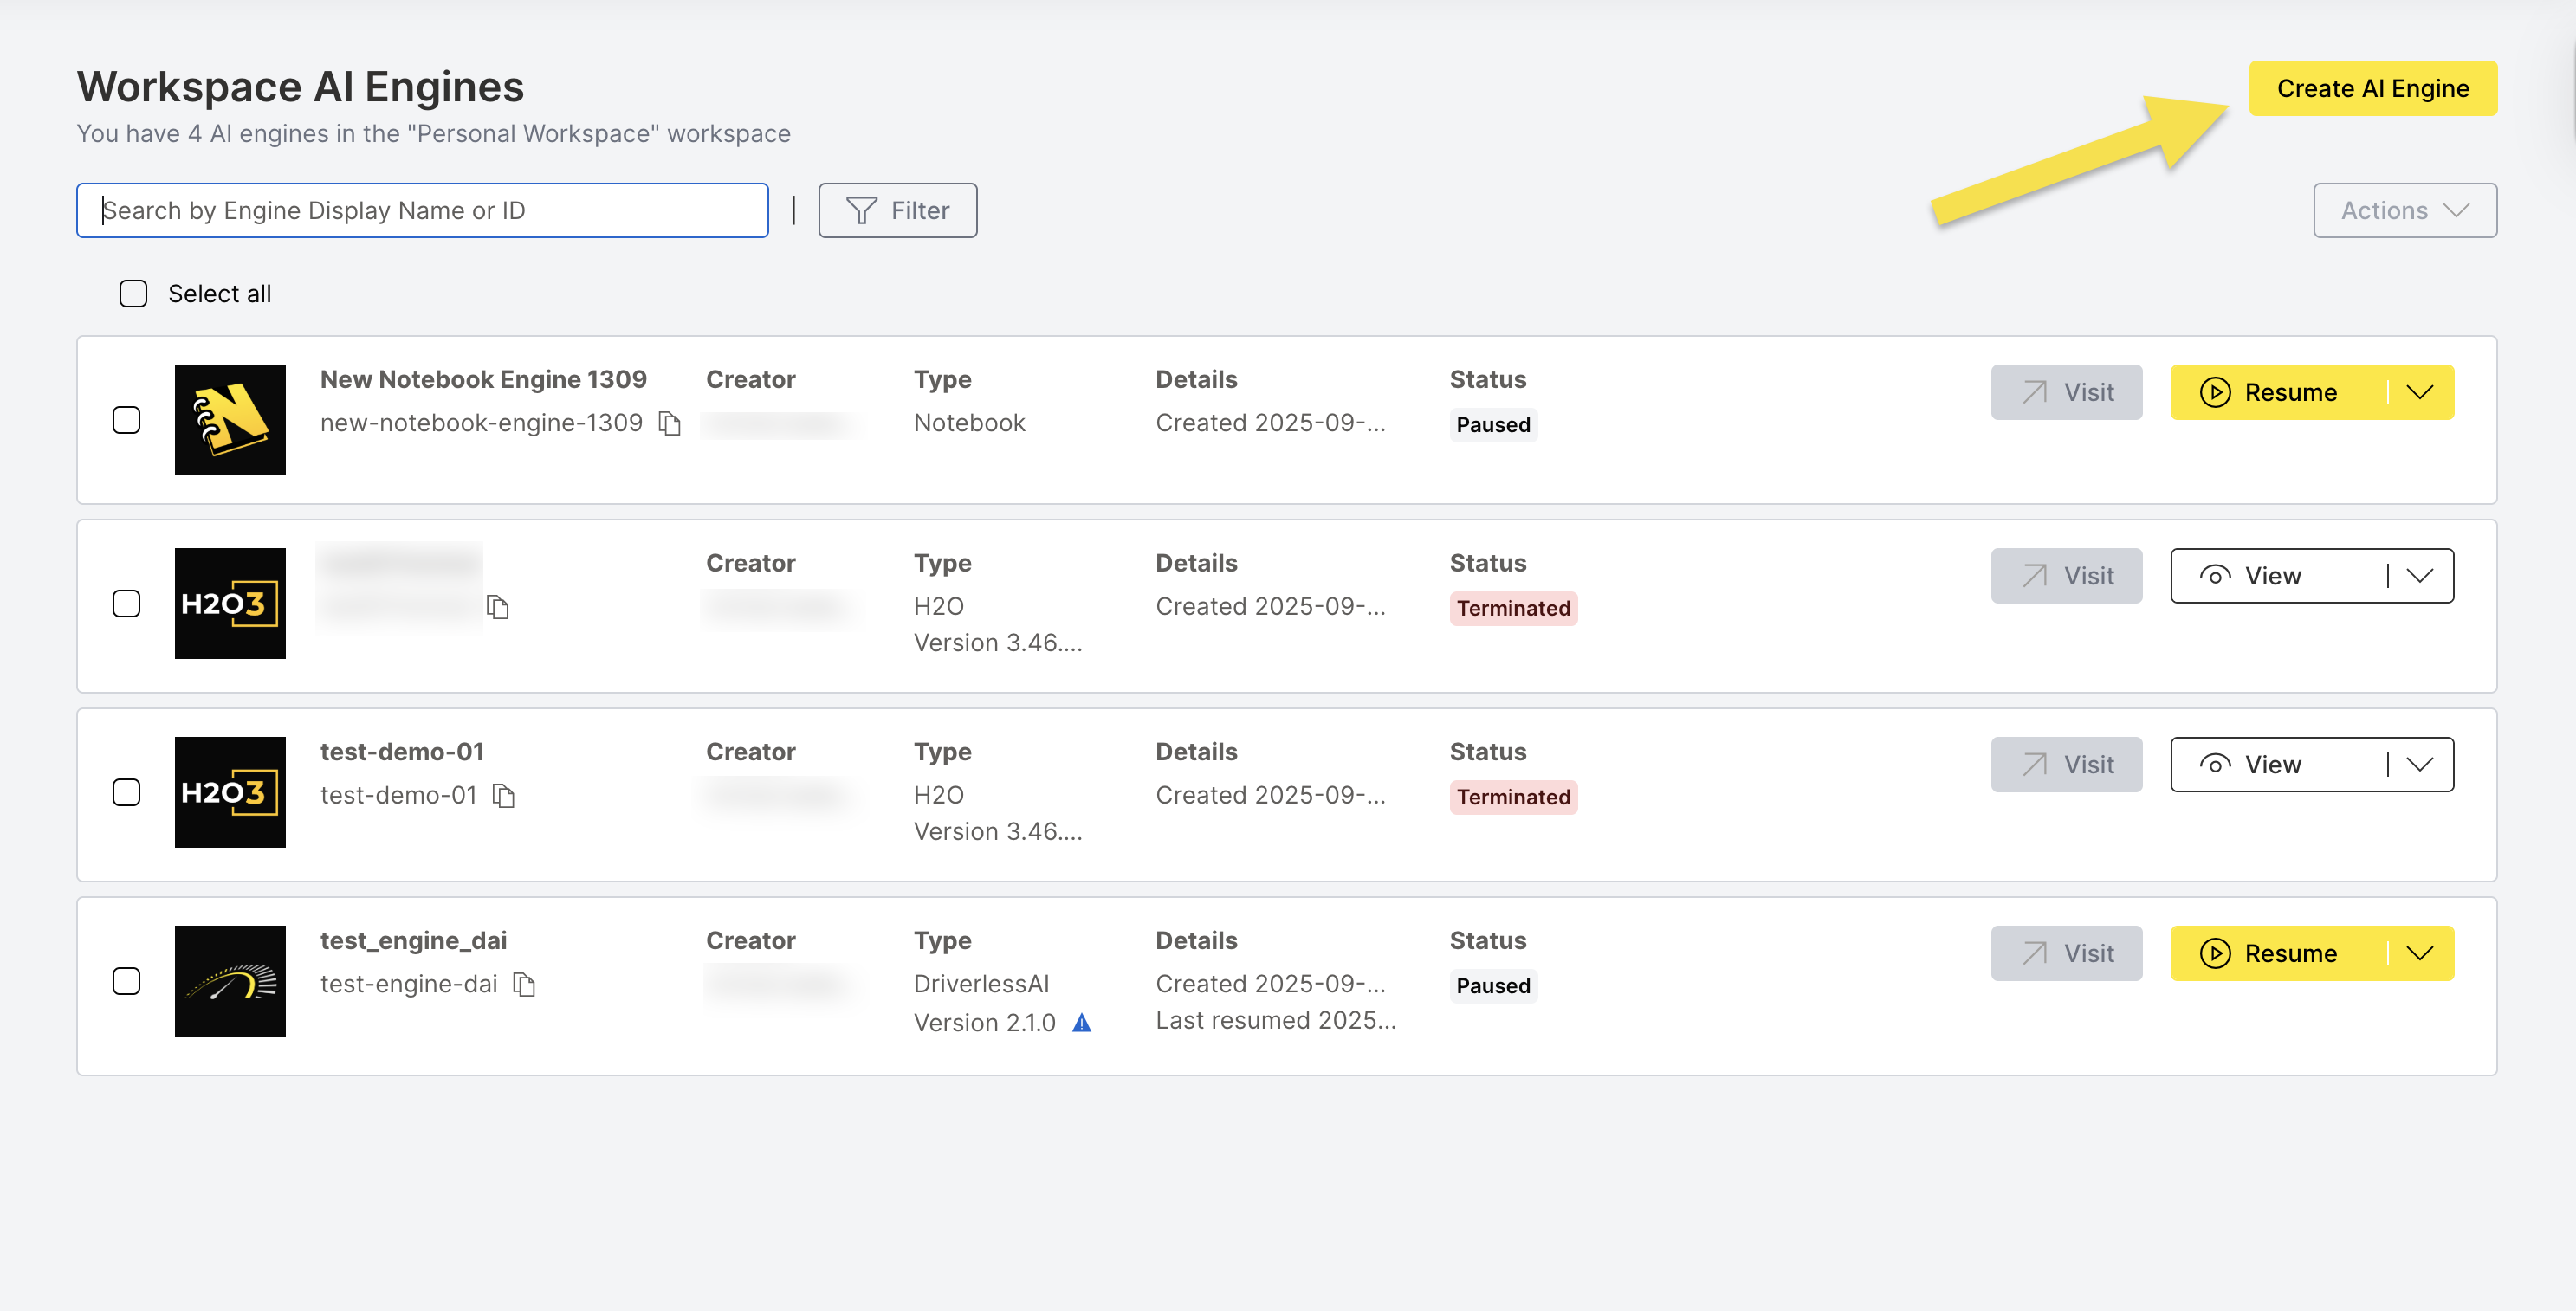
Step 1: Navigate to Create AI Engine
On the AI Engines page, click Create AI Engine.
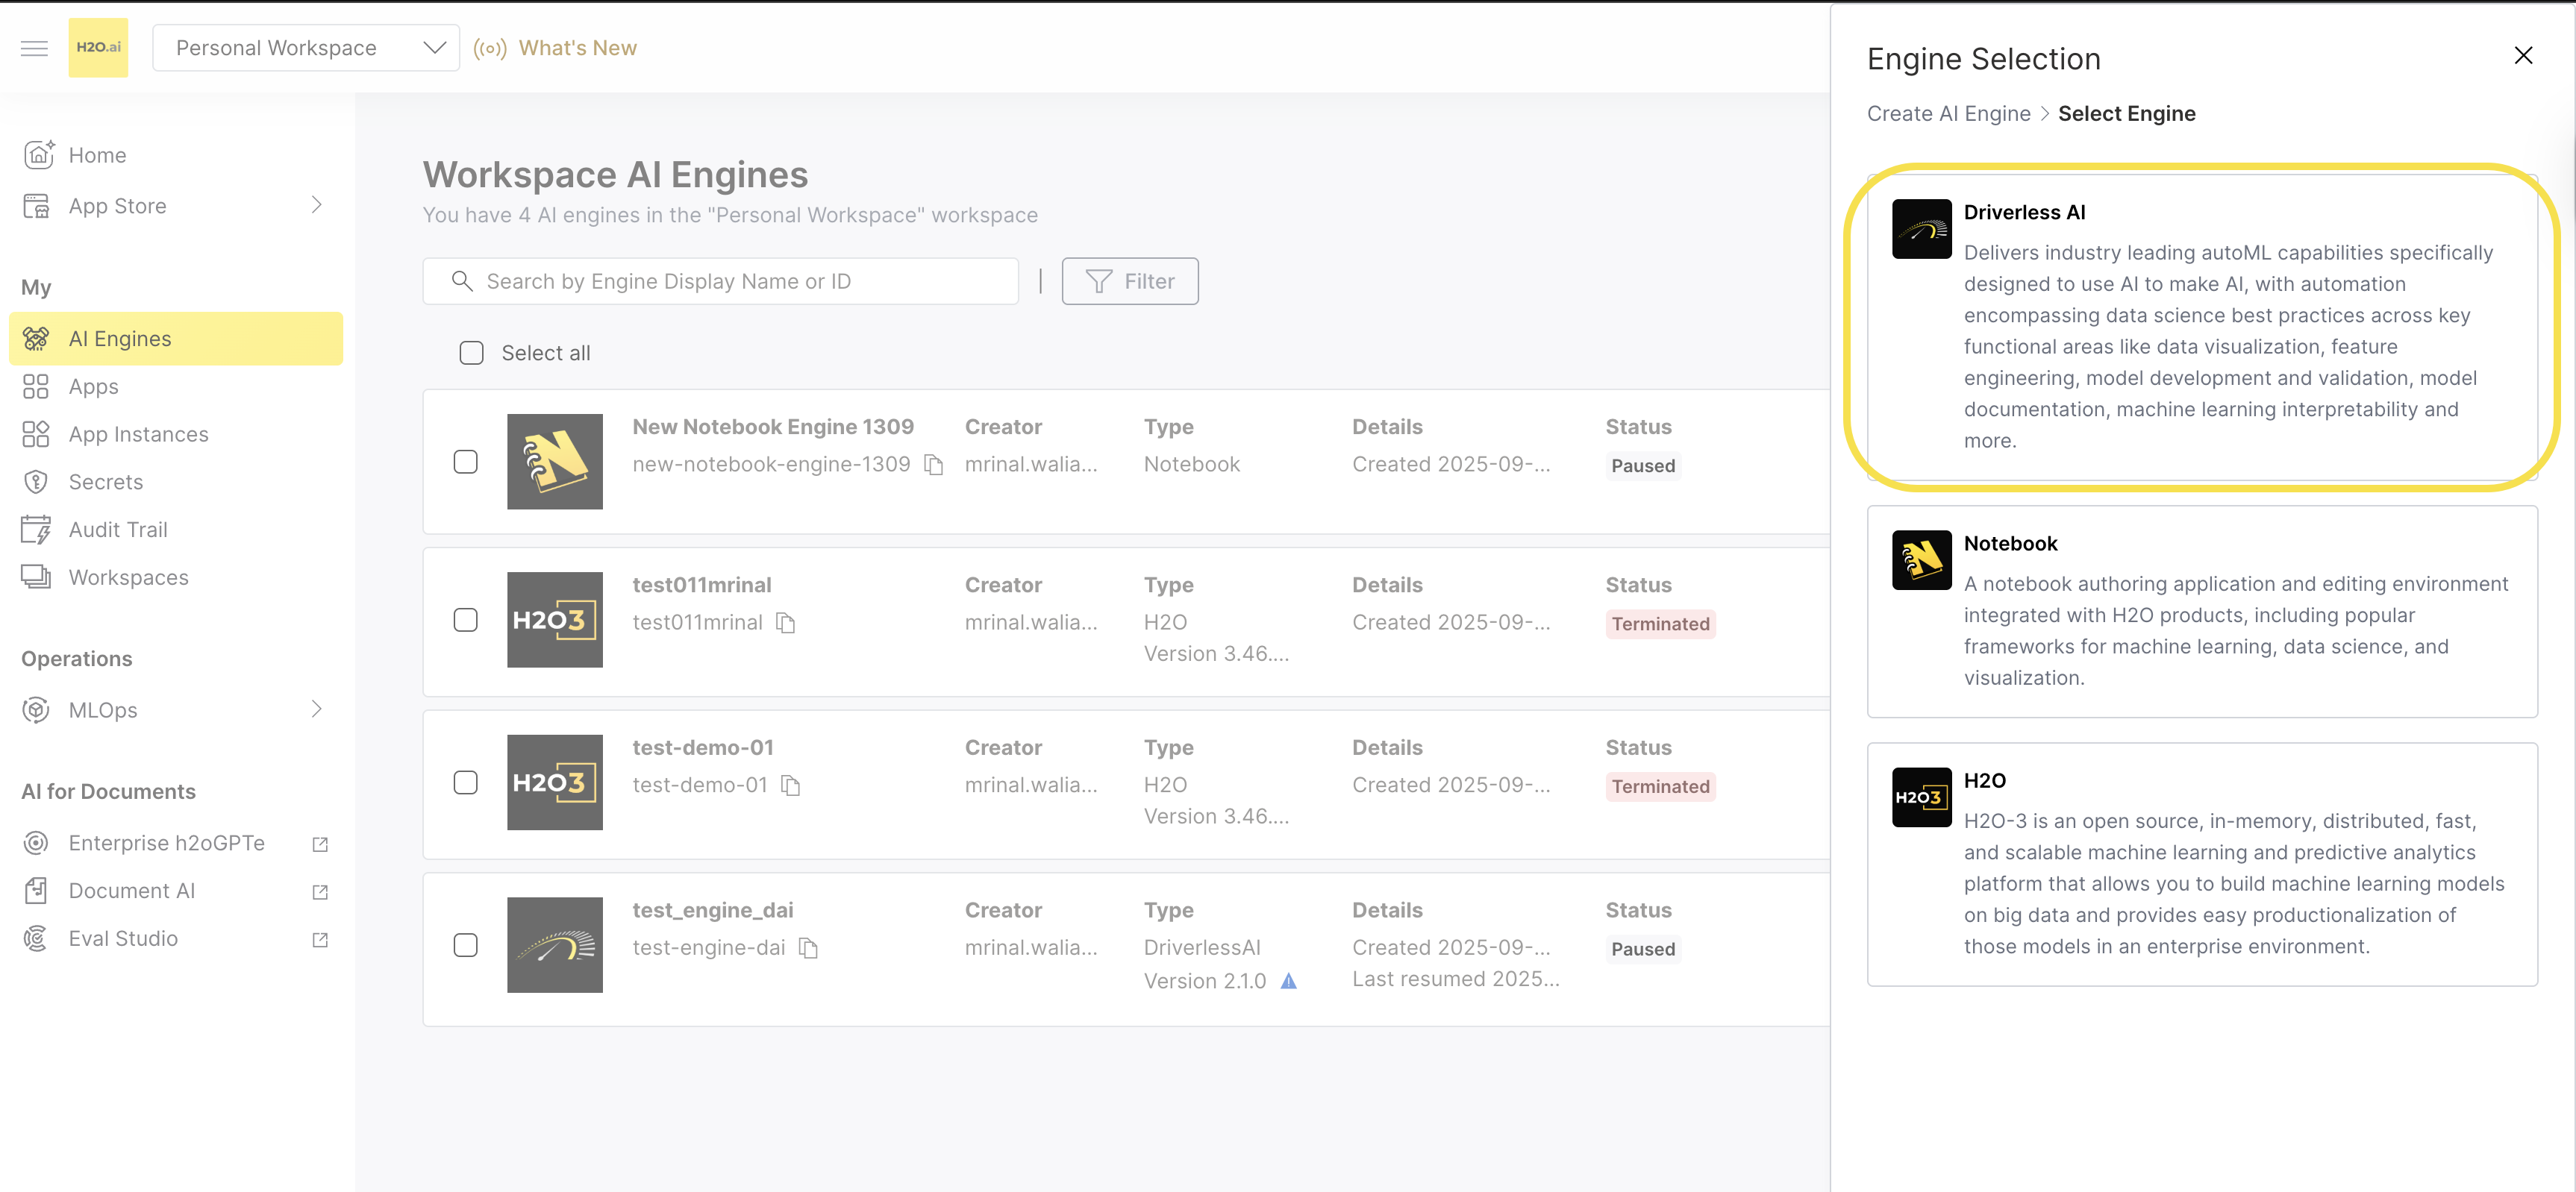
Step 2: Select Engine Type
On the Engine Selection tab, select Driverless AI.
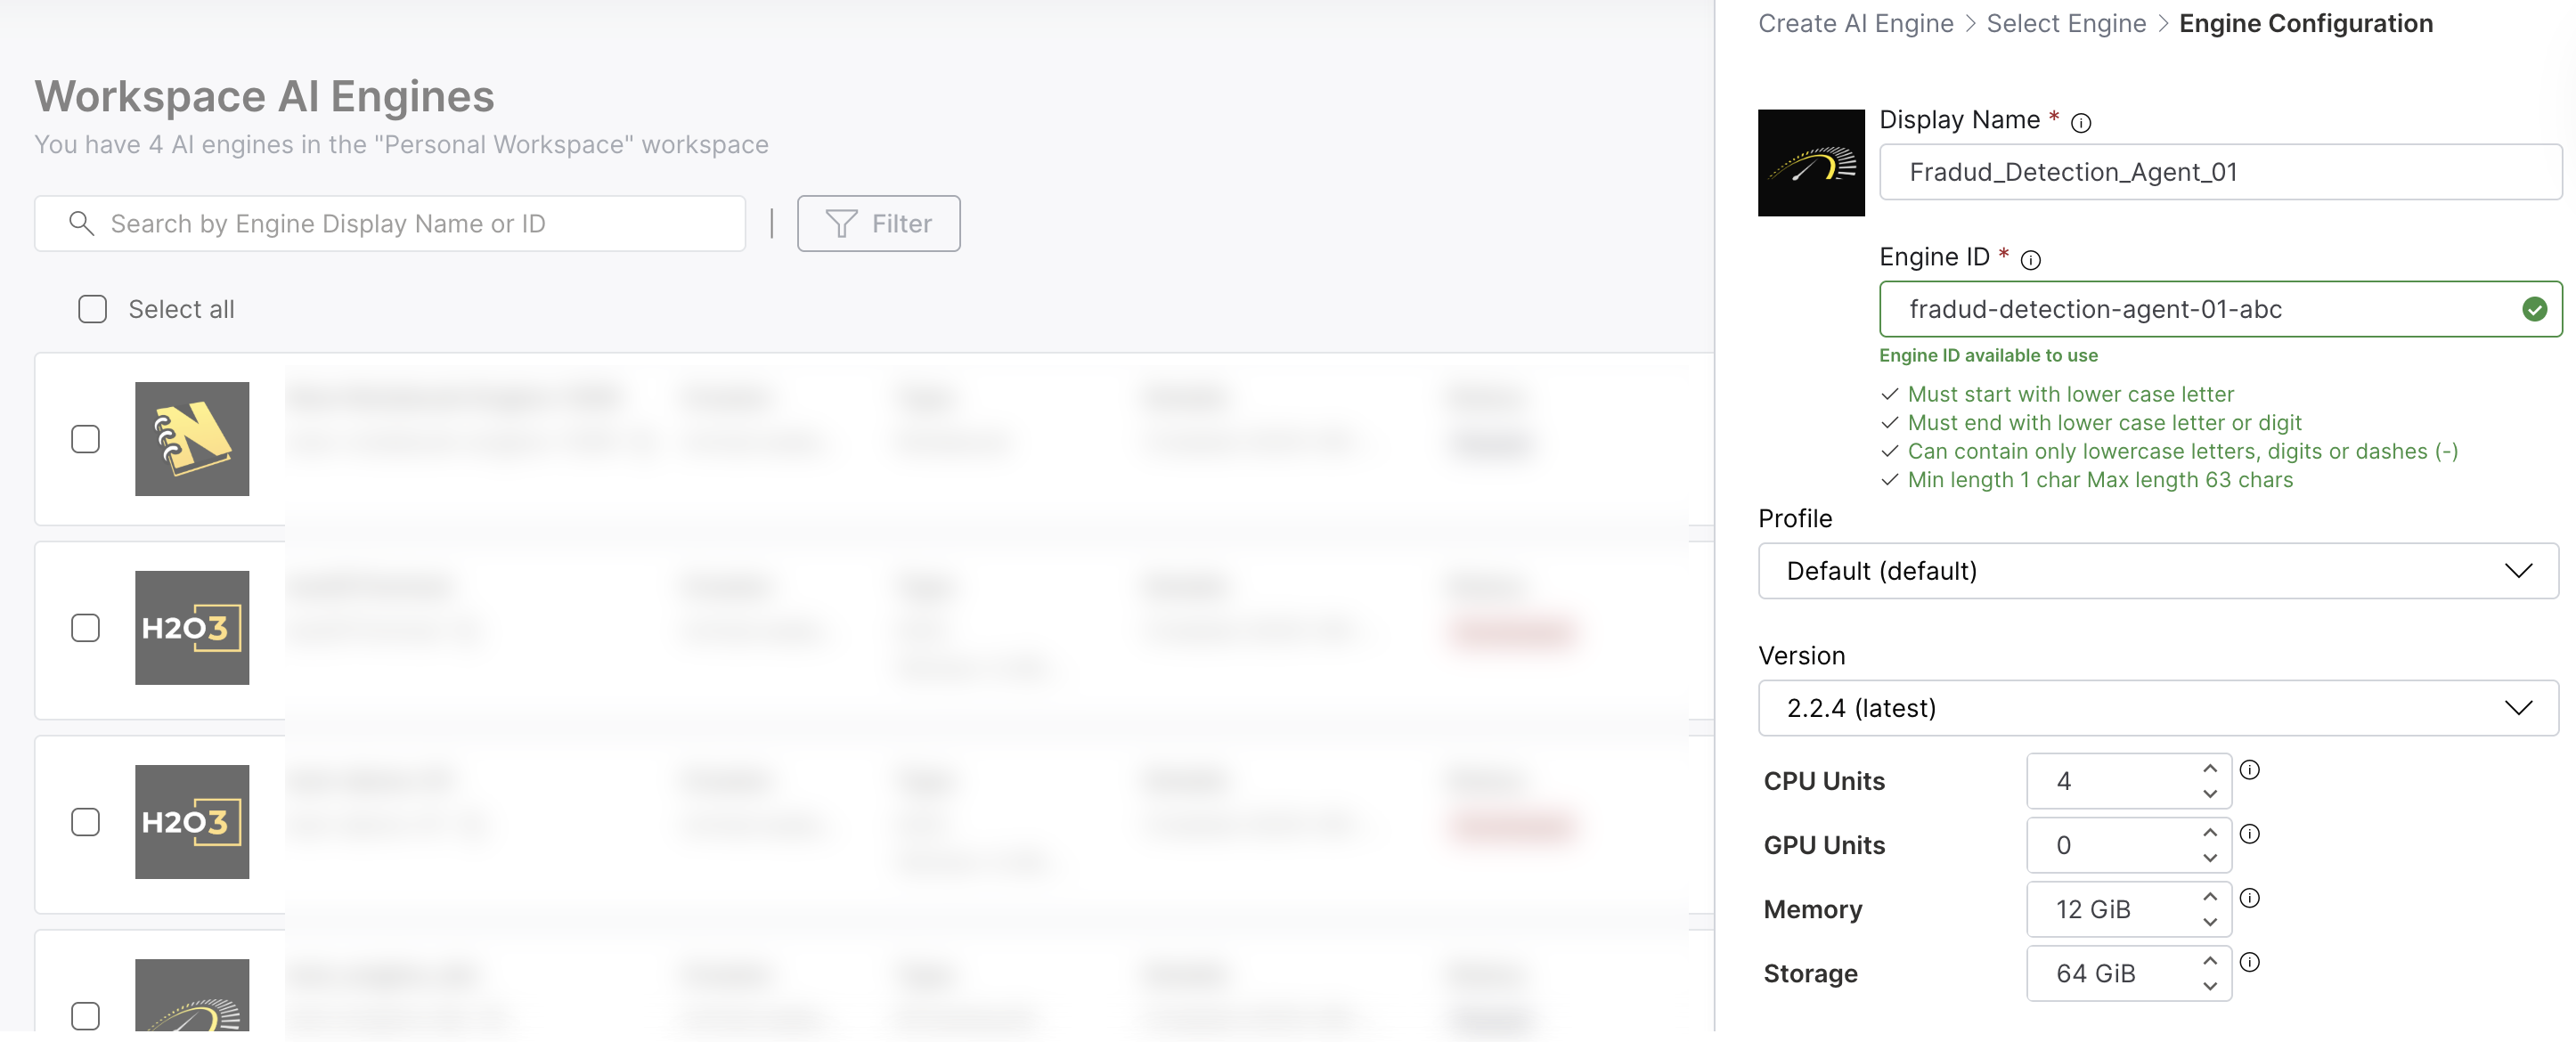
Step 3: Configure Engine Details
On the Create AI Engine > Select Engine > Engine Configuration page, provide the following information:
Display Name: Enter a descriptive name for your Driverless AI engine.
Engine ID: The system automatically generates a unique ID based on your display name. However, it is recommended to use a secure ID for your use case. Click the Edit (Pencil icon) icon to customize it.
Profile: Select an appropriate Profile from the dropdown. The profiles section, including the default profile, is managed by your admin. Contact your administrator or the H2O support team for more details.
Version: Choose the Driverless AI version from the dropdown. The latest version is recommended unless you have specific requirements.
Display Name:
- Can include special characters and alphanumeric characters
- Character limit: 63 characters
- Use a clear, descriptive name for easy identification
Engine ID:
- Must start with lower case letter
- Must end with lower case letter or digit
- Can contain only lowercase letters, digits or dashes (-)
- Min length: 1 char, Max length: 63 chars
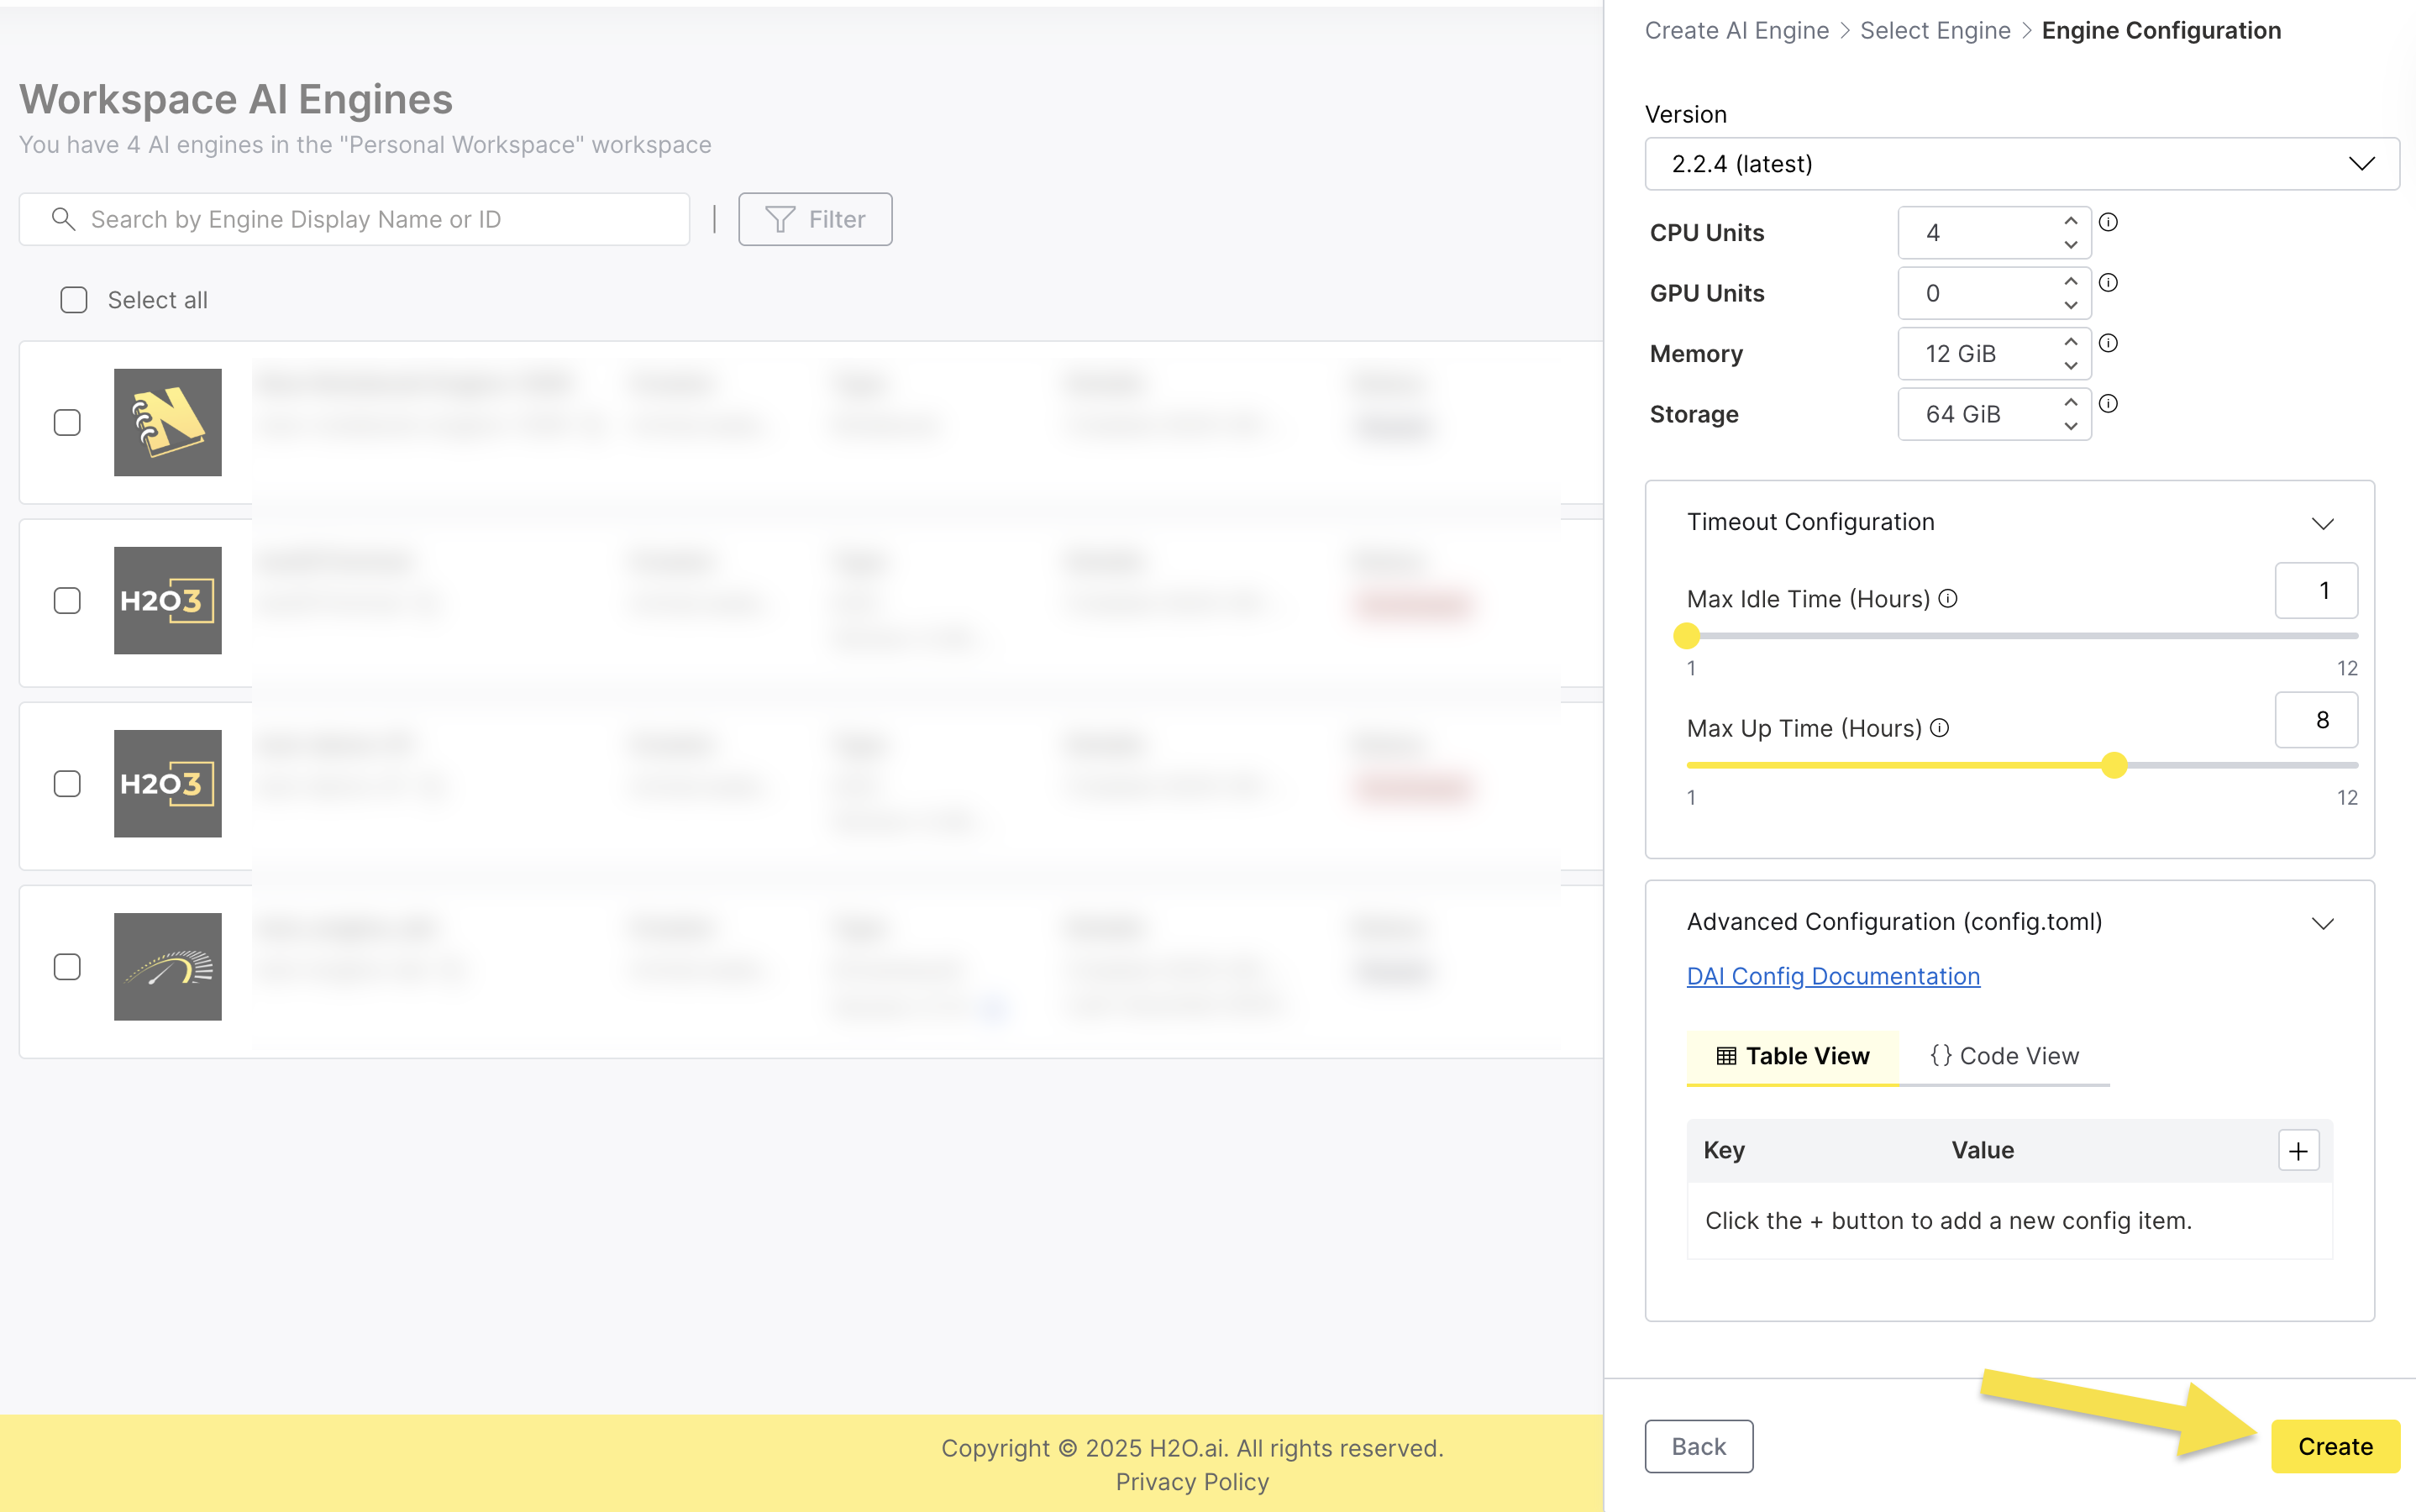
Step 4: Configure Resources
Configure the computational resources for your Driverless AI engine:
- CPU Units: Set the number of CPU units
- GPU Units: Configure GPU units if needed
- Memory: Allocate memory in GiB
- Storage: Set storage capacity in GiB
- The default values and range for CPU, GPU, Memory, and Storage are set by administrators. Contact your administrator or the H2O support team for more details.
Step 5: Configure Timeout Settings
Expand the Timeout Configuration section to set:
- Max Idle Time (Hours): Set how long the engine can be idle before automatically pausing.
- Max Up Time (Hours): Set the maximum duration an engine can run before automatically pausing.
- Set appropriate idle time based on your usage patterns
- Consider cost optimization vs. convenience
- Longer idle times reduce restart overhead but increase costs
Step 6: Advanced Configuration (Optional)
Expand the Advanced Configuration (config.toml) section for advanced settings:
- Table View: Add configuration parameters using a user-friendly table interface
- Code View: Edit the configuration file directly in TOML format
For detailed information about Driverless AI configuration options, see the DAI Config Documentation.
Step 7: Create the Engine
- Review all your configuration settings.
- Click Create to create the Driverless AI engine.
- The engine will be provisioned and appear in your AI Engines list.
- Submit and view feedback for this page
- Send feedback about AI Engine Manager to cloud-feedback@h2o.ai